[tatsu_section padding= "90px 0% 90px 0%"][tatsu_row layout= "1/1"][tatsu_column layout= "1/1"][tatsu_text max_width= "" wrap_alignment= "center" animation_type= "none"]I started this blog in June, and had all these grandiose plans of jumping in and having tons of fun DIYs, recipes, and thoughts on current design to post. I clearly did not know very much about blogging. I'm not usually even a big DIY-er or baker, so I'm not sure why I thought that because I started a blog, I would magically become this creative stay-at-home mom stereotype.
In addition, I don't have a ton of time or resources to devote to full-time blogging right now. Having graduated in May, I've been working toward truly beginning my graphic design career. Job hunting and blogging both take a ton of time and effort, and I feel guilty for not doing both constantly. I need to stop putting such pressure on myself and just do it! I've been keeping in mind the classic "start before you're ready" thought process and am really starting to just go for it.
I registered X•Height•Ment at the beginning of September, and have been working hard on that side hustle, designing stationery items and working on different projects. Adding that to my plate has been exciting, and really getting into the vibe of making things again has been incredible for getting my creative flow moving.
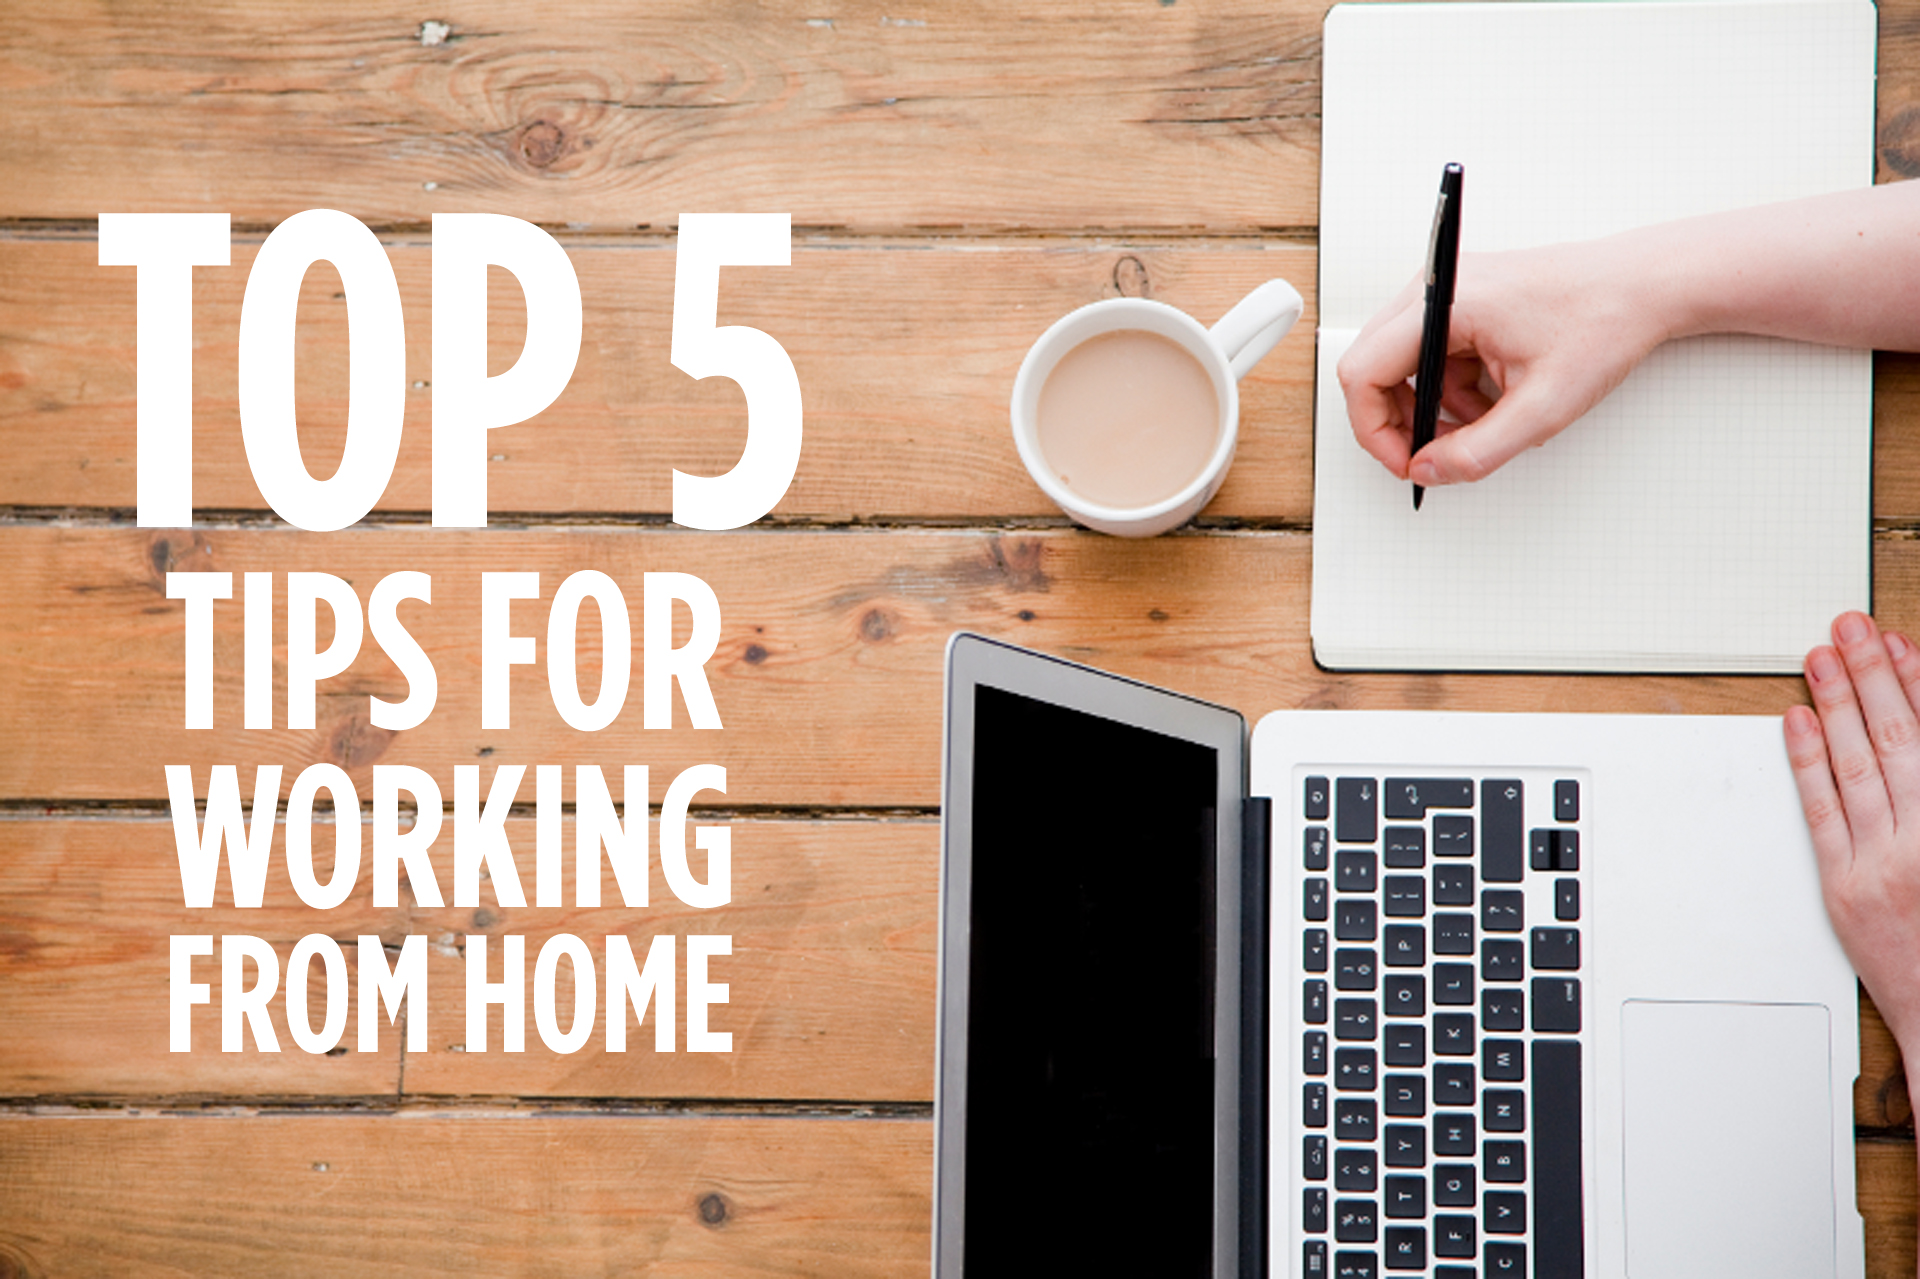
Something I've had to fight the whole time I've been writing is perfectionism. It's so easy for me to get caught up in trying to make everything I post the best thing I've ever written or the coolest thing I've ever done. Shorter posts are okay! People just like updates! And let's be honest, not everyone on the internet really has that long of an attention span anyway. I can't tell you how many drafts I've saved without posting because it didn't feel like 'enough' for a full post. So I've been trying to remember: An imperfect, published post is better than a perfect, unpublished draft.[/tatsu_text][tatsu_text max_width= "" wrap_alignment= "center" animation_type= "none"]All of that being said, here are my top five tips for working at home!
- Get dressed. This is key for me. I love to lounge around at home, but I always get dressed when I leave the house. When working from home, getting dressed really helps put me in that productive mindset. Plus, if I have to answer the door or run out to get something, I'm already ready to go.
- Set a schedule. I like to plan out my days, even by the hour. It really helps me set a pseudo-workday and plan my time effectively so that I don't feel like I have to be working on something 24/7.
- Make lists (so many lists). I'm a list junkie. I make them for literally everything in my life. I have this perfect notebook that's long and skinny, and I make lists in it every. day. Listing helps me stay organized and helps give me that sense of accomplishment of checking off the box when I complete a task.
- Take breaks (especially to eat)! I always make sure to include lunch on my daily to do lists, because otherwise I'll get wrapped up in my work and won't make time for it until like 4 pm. Short breaks help me come back to a project with fresh eyes and keeps me from getting too frustrated with a project after working on it for several hours–or even just help my body stretch and move around a little bit after sitting still or staying in one position too long.
- Don't work in bed. Go to the library or a coffeeshop if you have to. When working from home, it's super tempting to just cozy up in bed with my dog and browse the internet all day. Moving to my desk or going somewhere else is beneficial for lessening that temptation and putting me in work mode.
[/tatsu_text][tatsu_text max_width= "" wrap_alignment= "center" animation_type= "none"]If you have any more tips for being productive while blogging or working from home, share them with me in the comments or on Instagram/Twitter![/tatsu_text][/tatsu_column][/tatsu_row][/tatsu_section]
 [/tatsu_text][tatsu_text max_width= "" wrap_alignment= "center" animation_type= "none"]
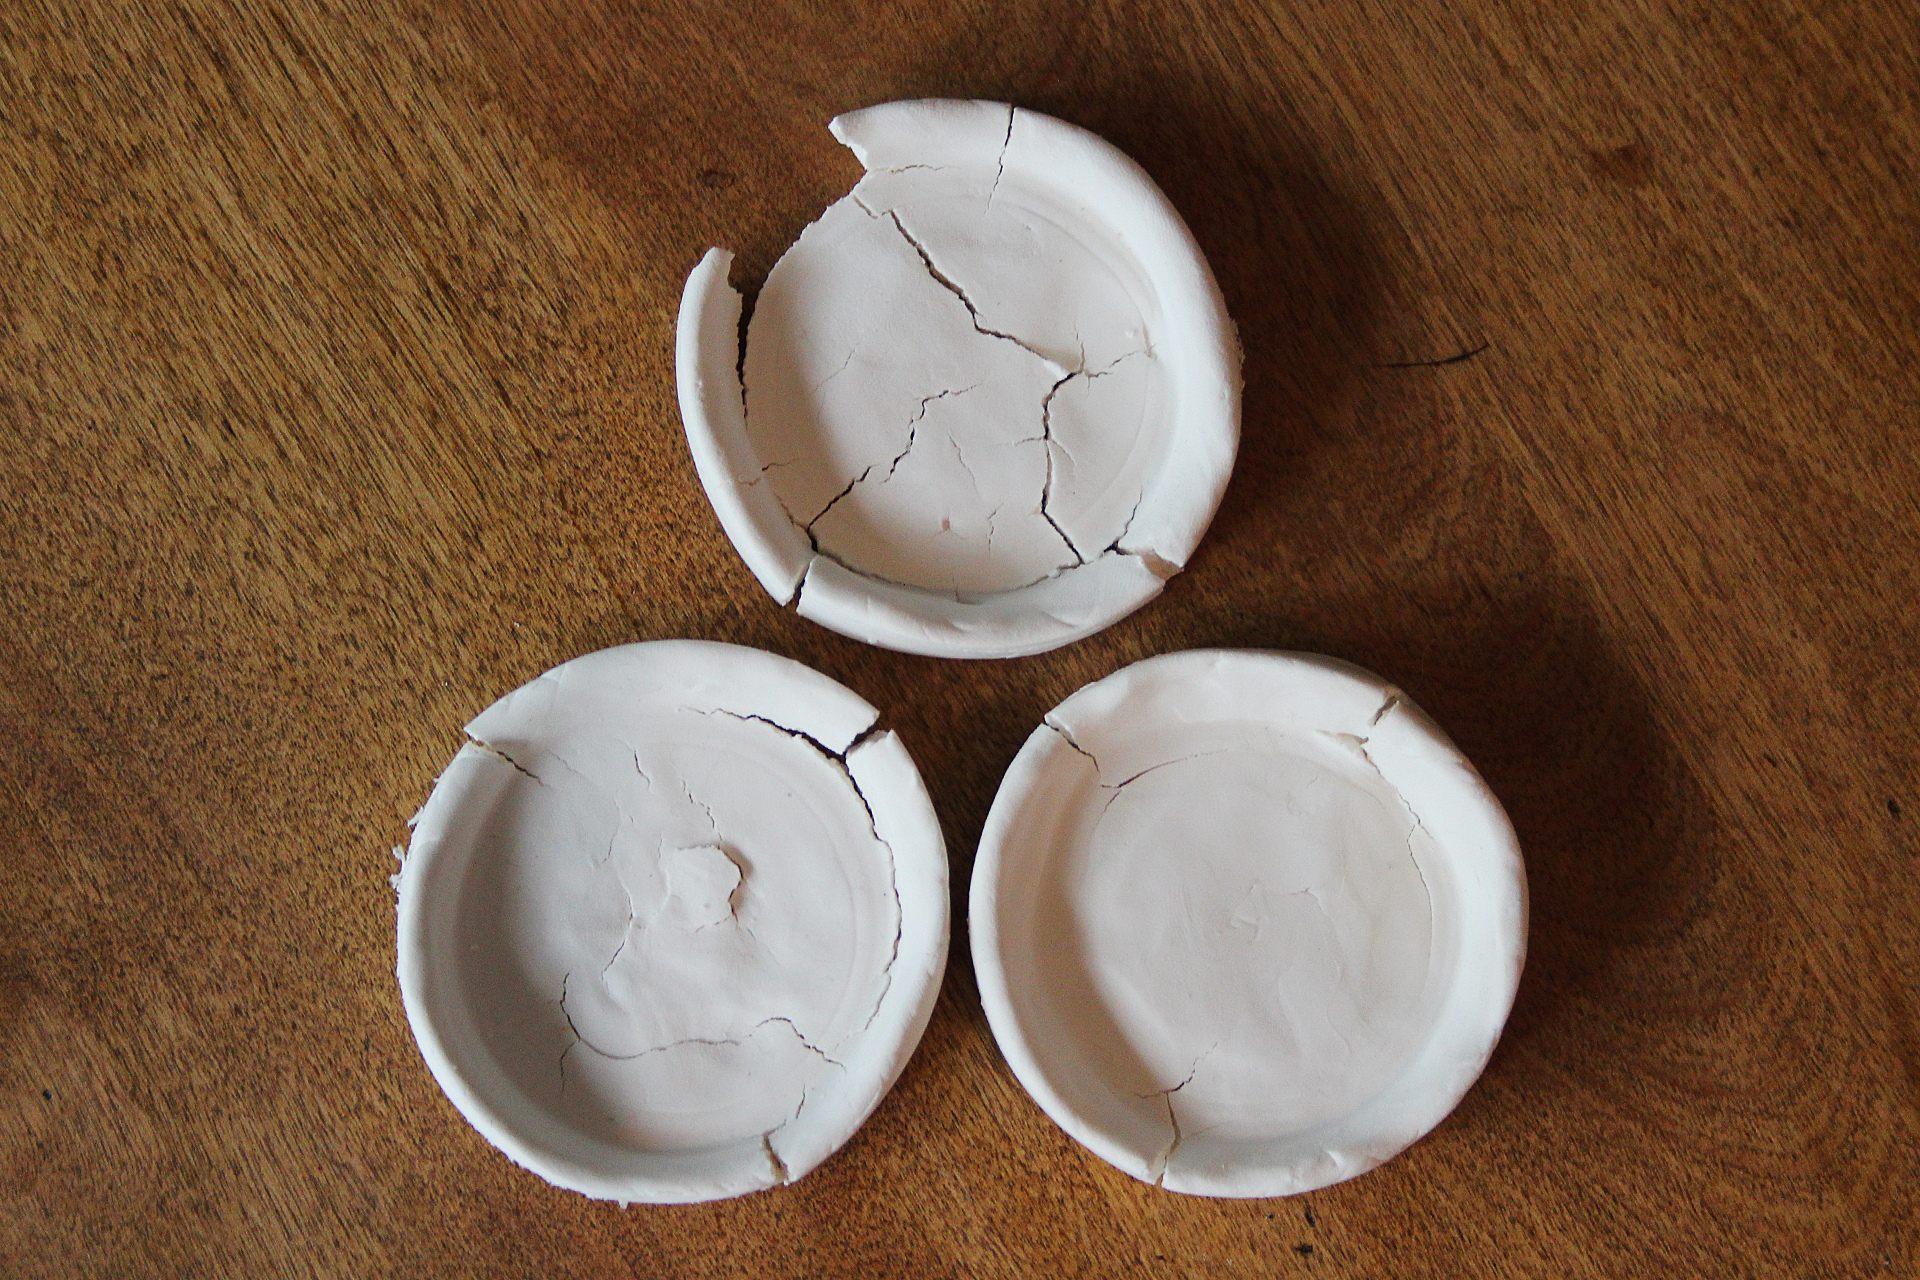
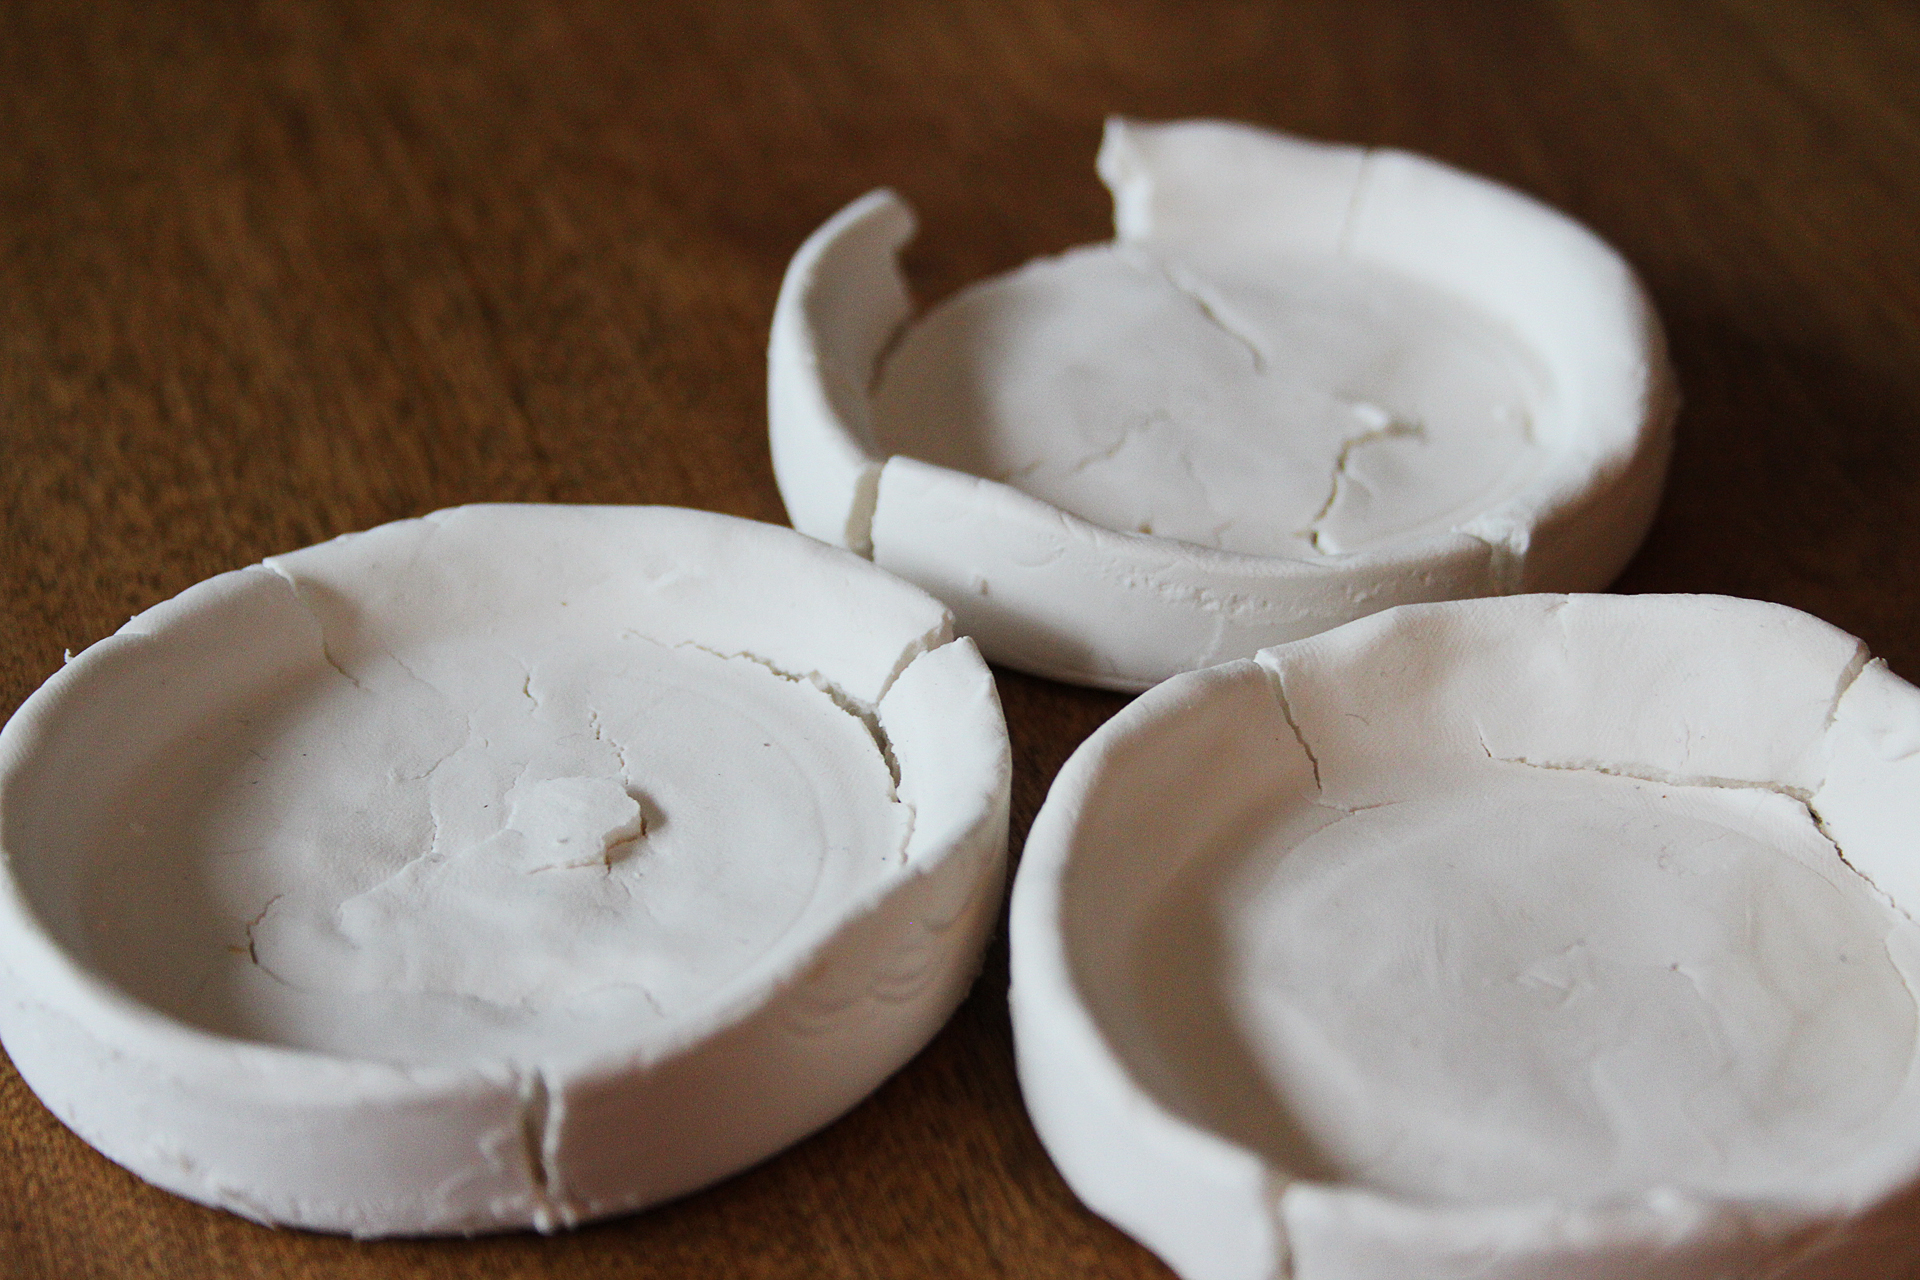 [/tatsu_text][tatsu_text max_width= "" wrap_alignment= "center" animation_type= "none"]First up, trinket/ring dishes! I have seen so many people making these, and they've all turned out so cute–so naturally, I wanted to make a few for my friends. Unfortunately, the ramekins I used to help form the shape of the dishes weren't porous enough, and so the dishes never fully dried all the way through (although they did crack quite a bit!). Definitely not usable.[/tatsu_text][tatsu_text max_width= "" wrap_alignment= "center" animation_type= "none"]
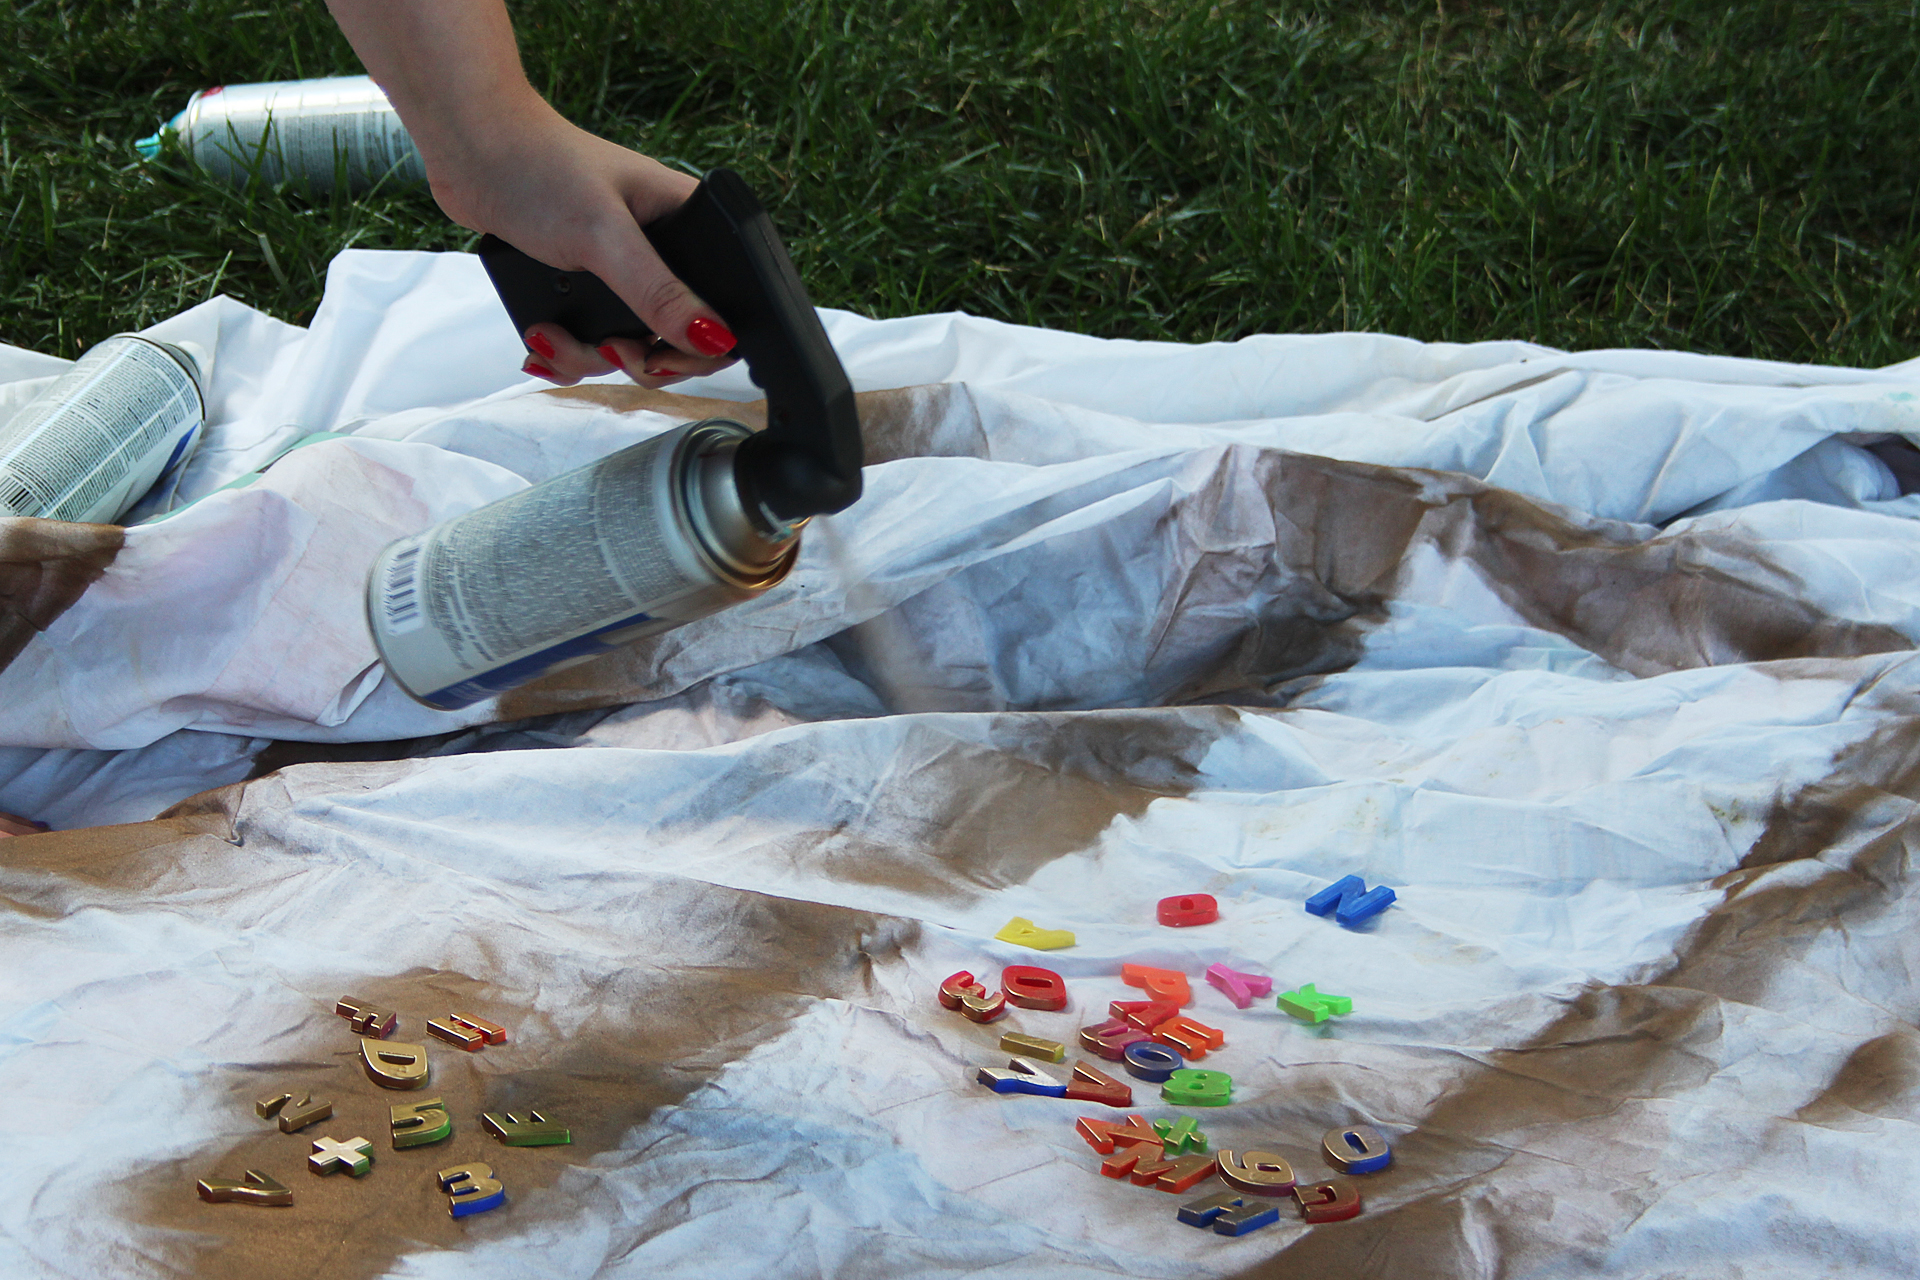 [/tatsu_text][tatsu_text max_width= "" wrap_alignment= "center" animation_type= "none"]
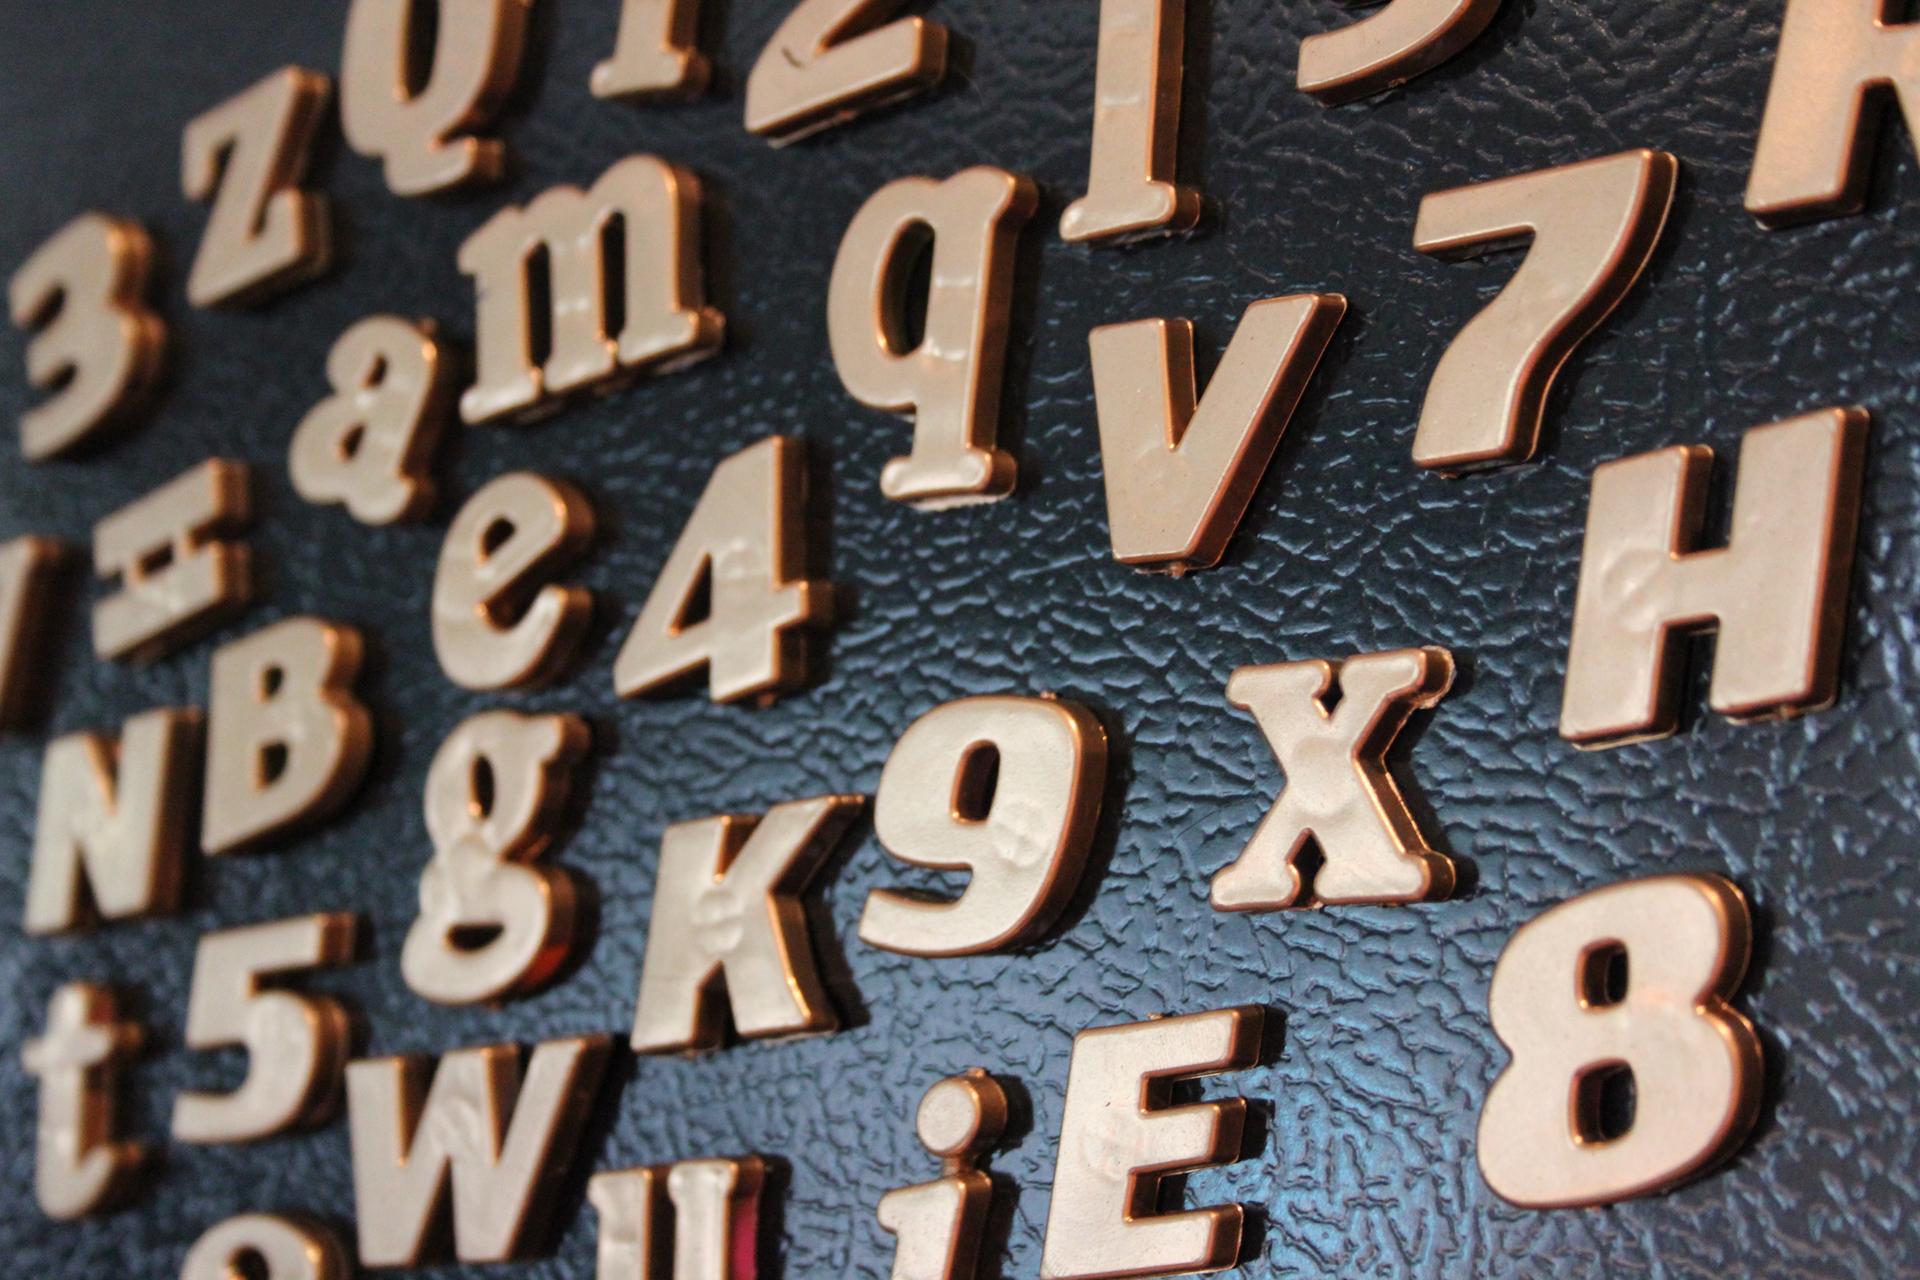 [/tatsu_text][tatsu_text max_width= "" wrap_alignment= "center" animation_type= "none"]Next, I've been on a gold kick recently and thought spray painting some letter magnets would add some class to our refrigerator. They turned out fine, but they felt pretty anticlimactic. I'm not sure what I was expecting from them, but it just felt like I couldn't validate an entire post for them.[/tatsu_text][tatsu_text max_width= "" wrap_alignment= "center" animation_type= "none"]
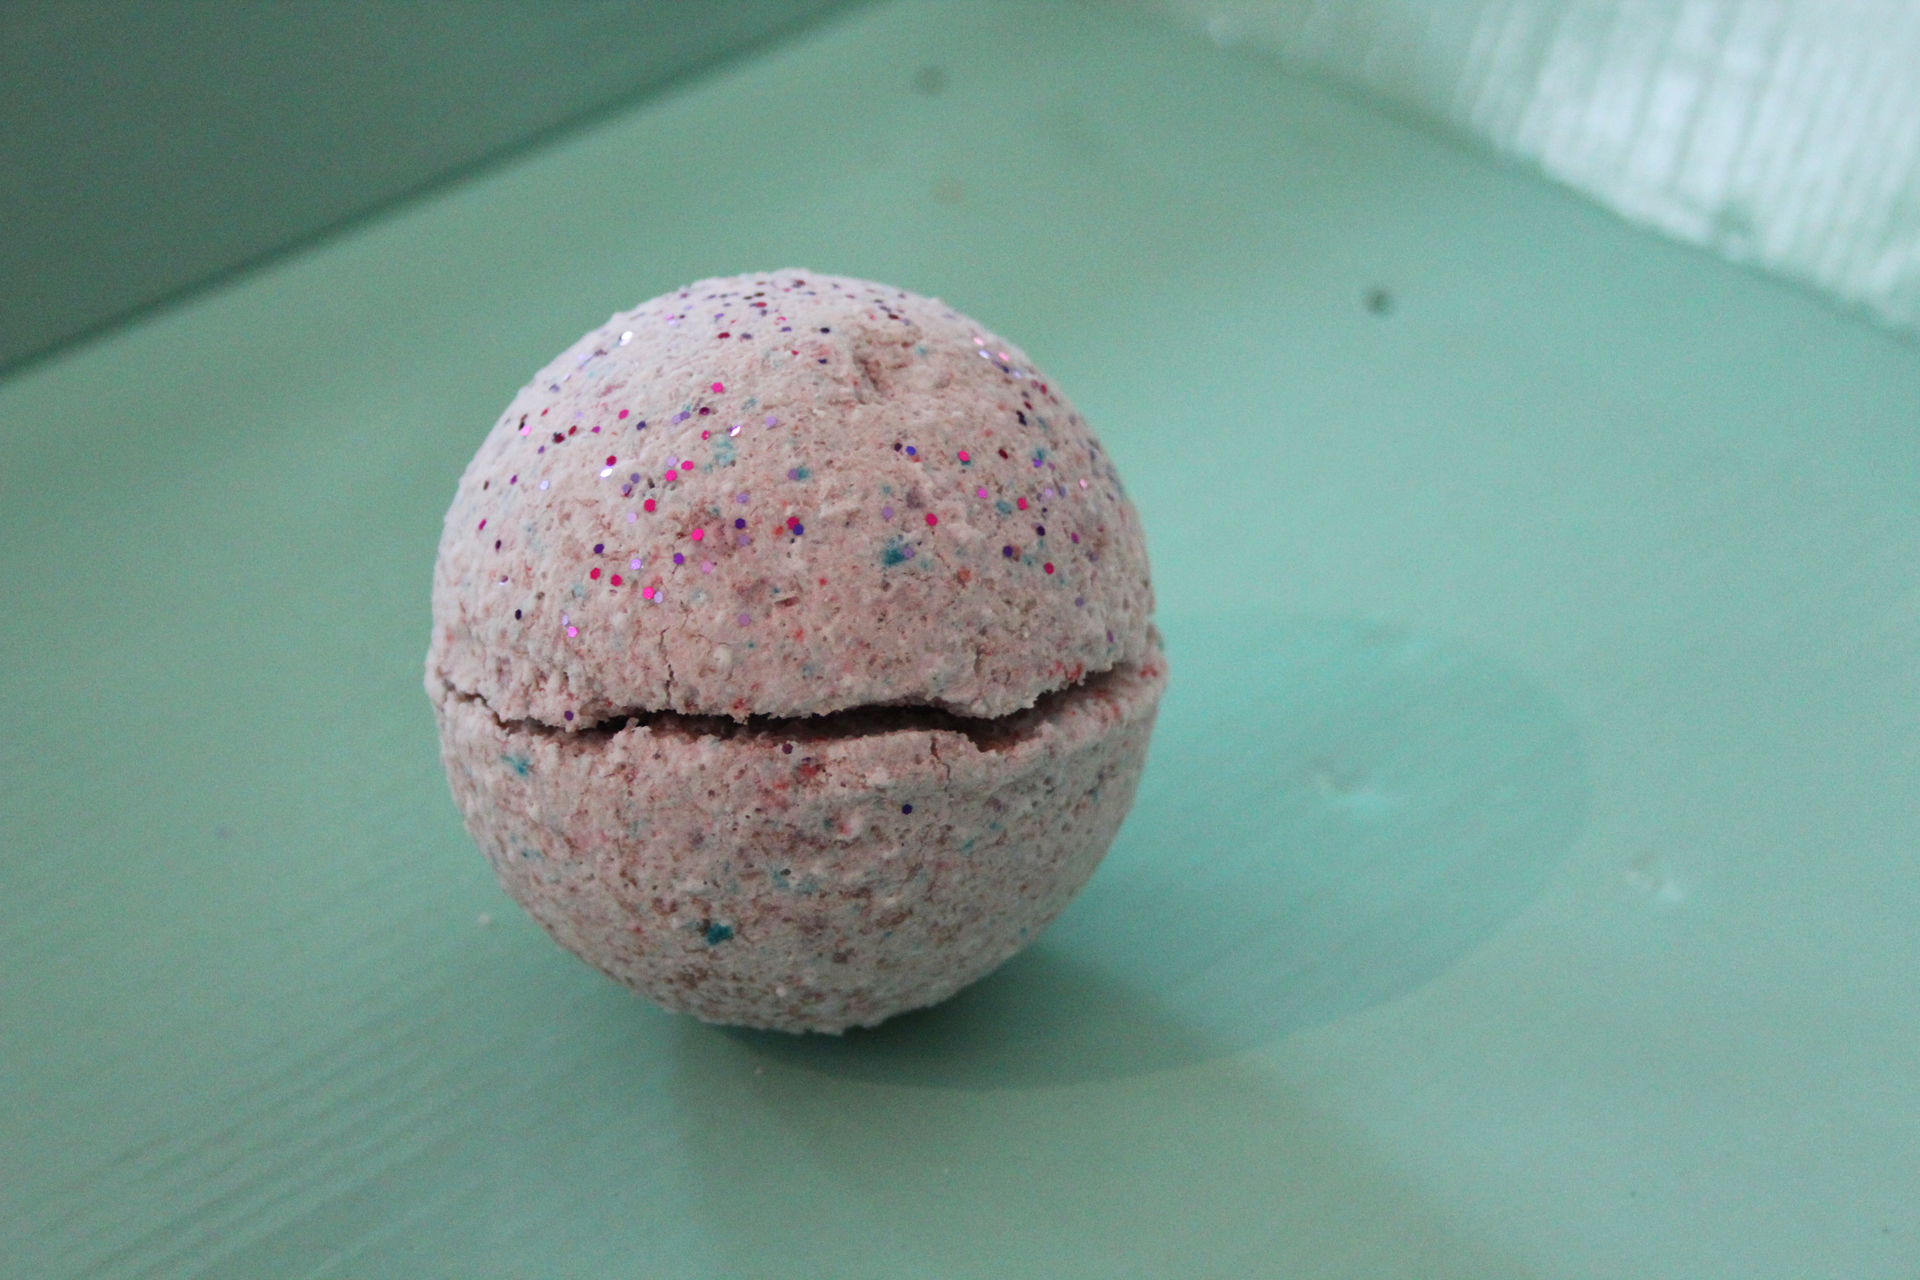 [/tatsu_text][tatsu_text max_width= "" wrap_alignment= "center" animation_type= "none"]
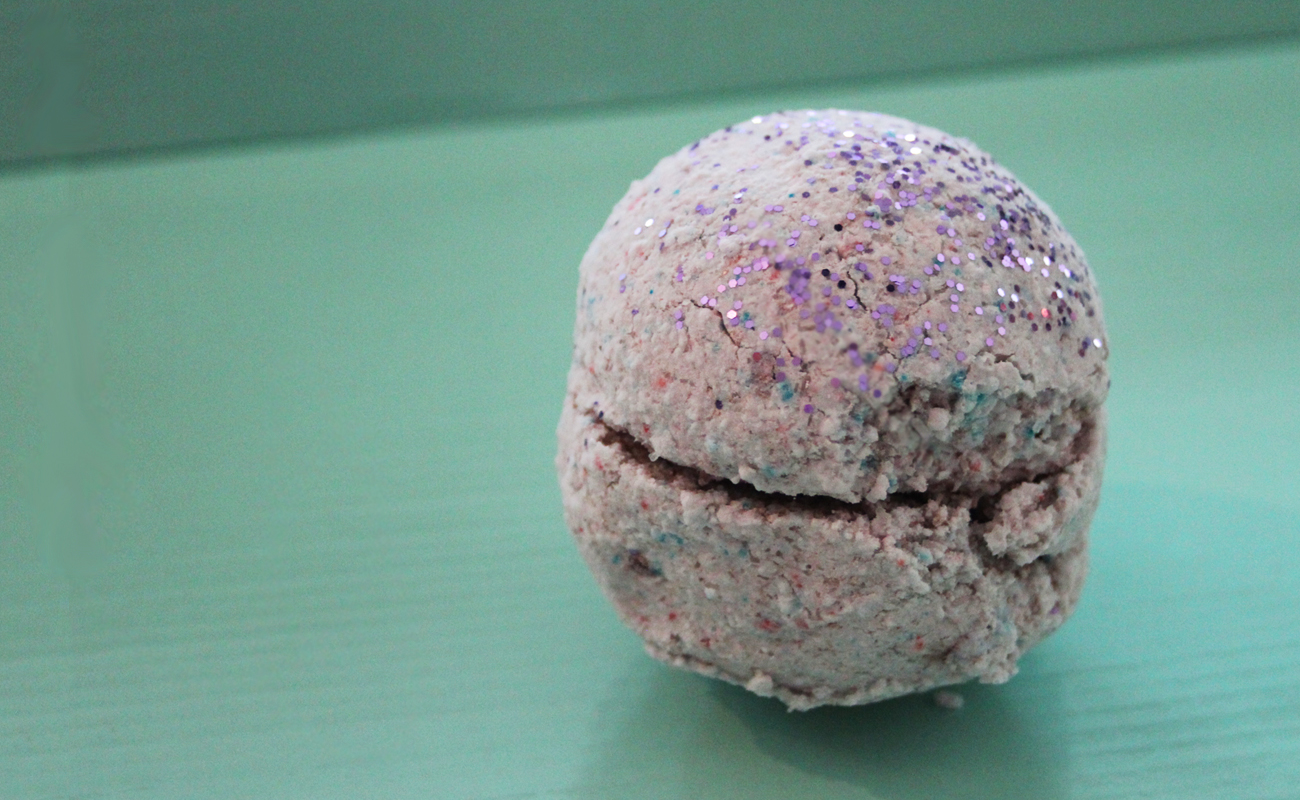
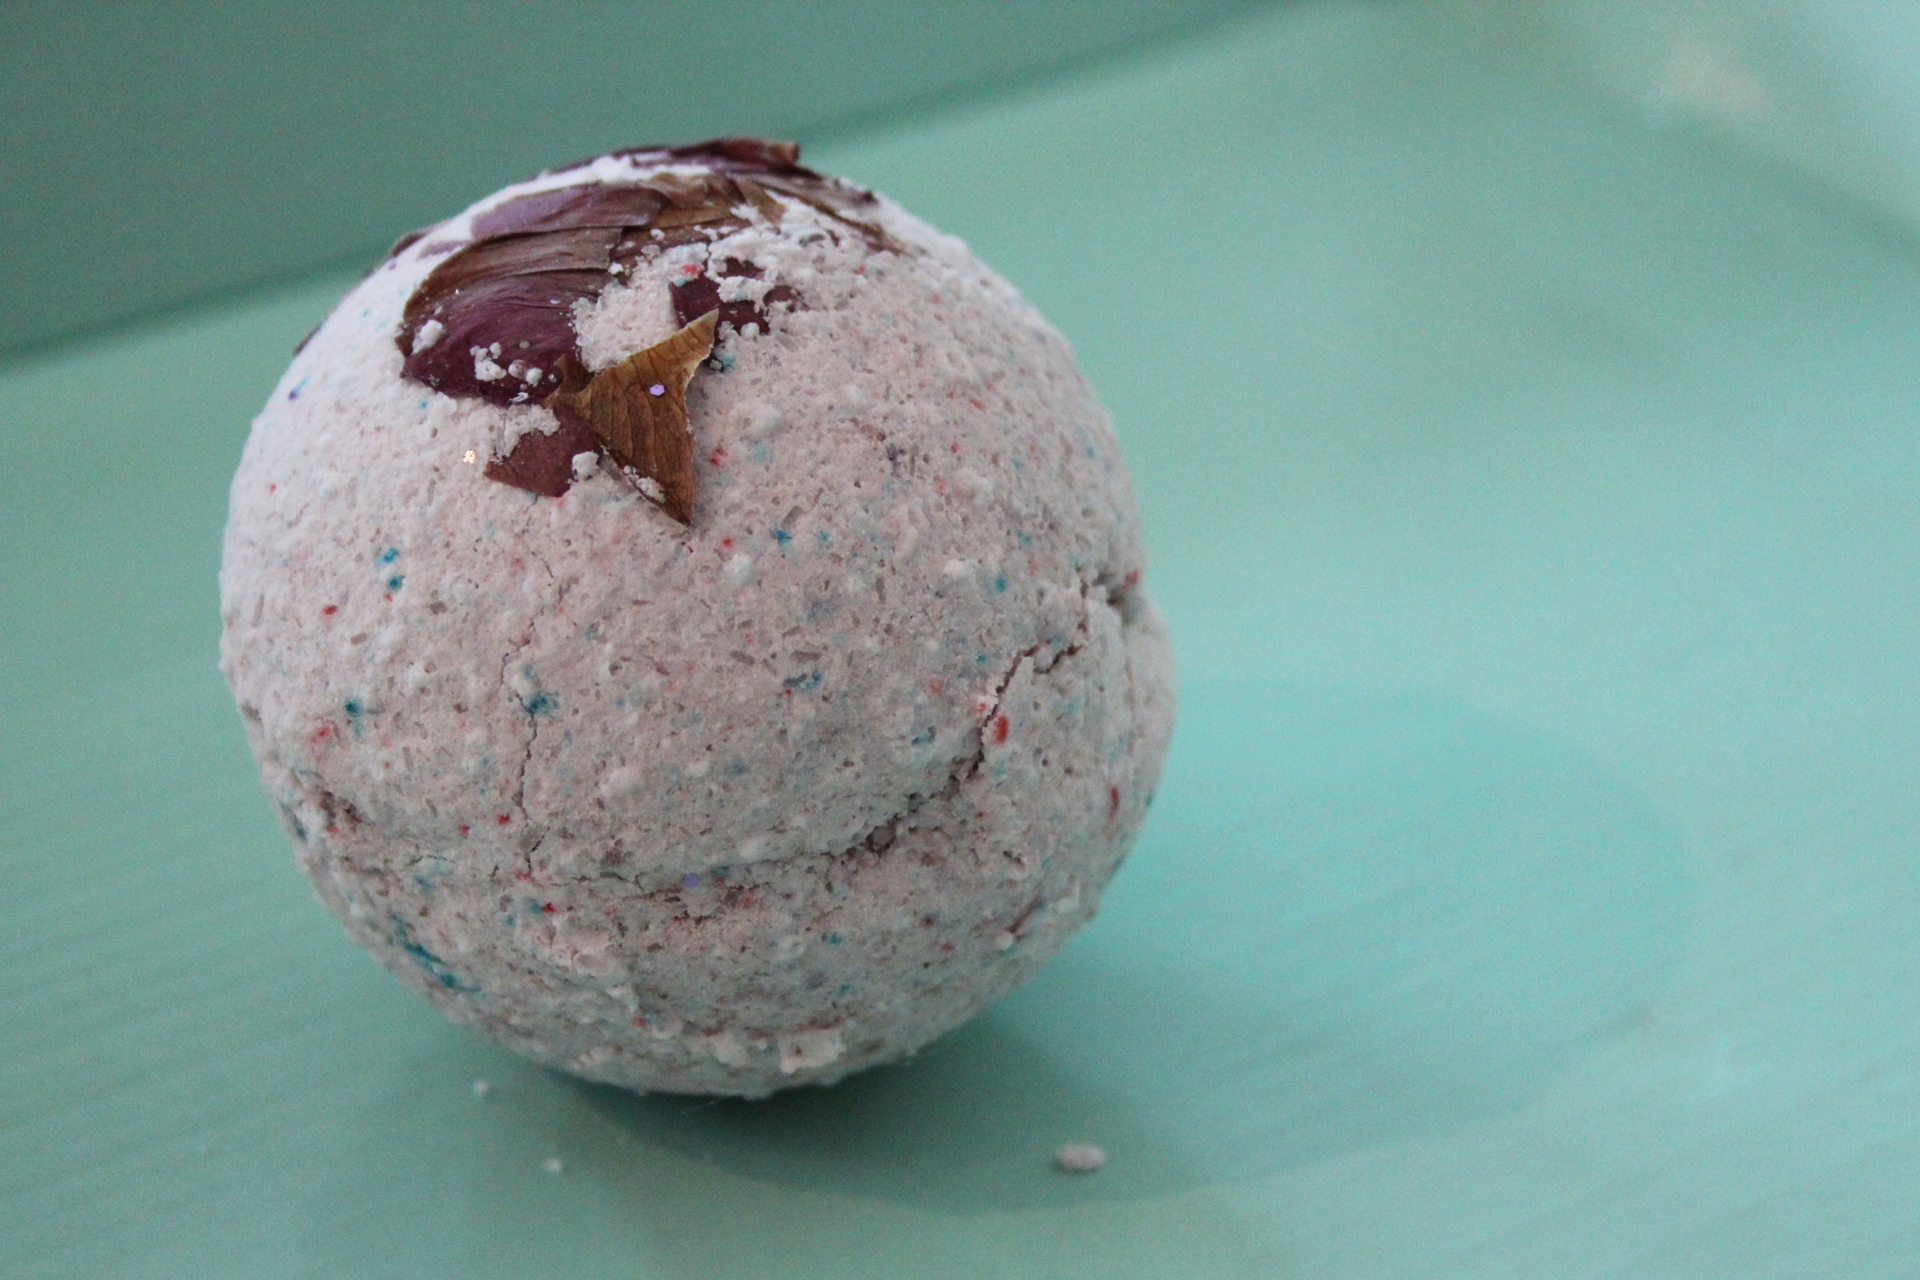 [/tatsu_text][tatsu_text max_width= "" wrap_alignment= "center" animation_type= "none"]And lastly, bath bombs. Okay, so I love these things.
 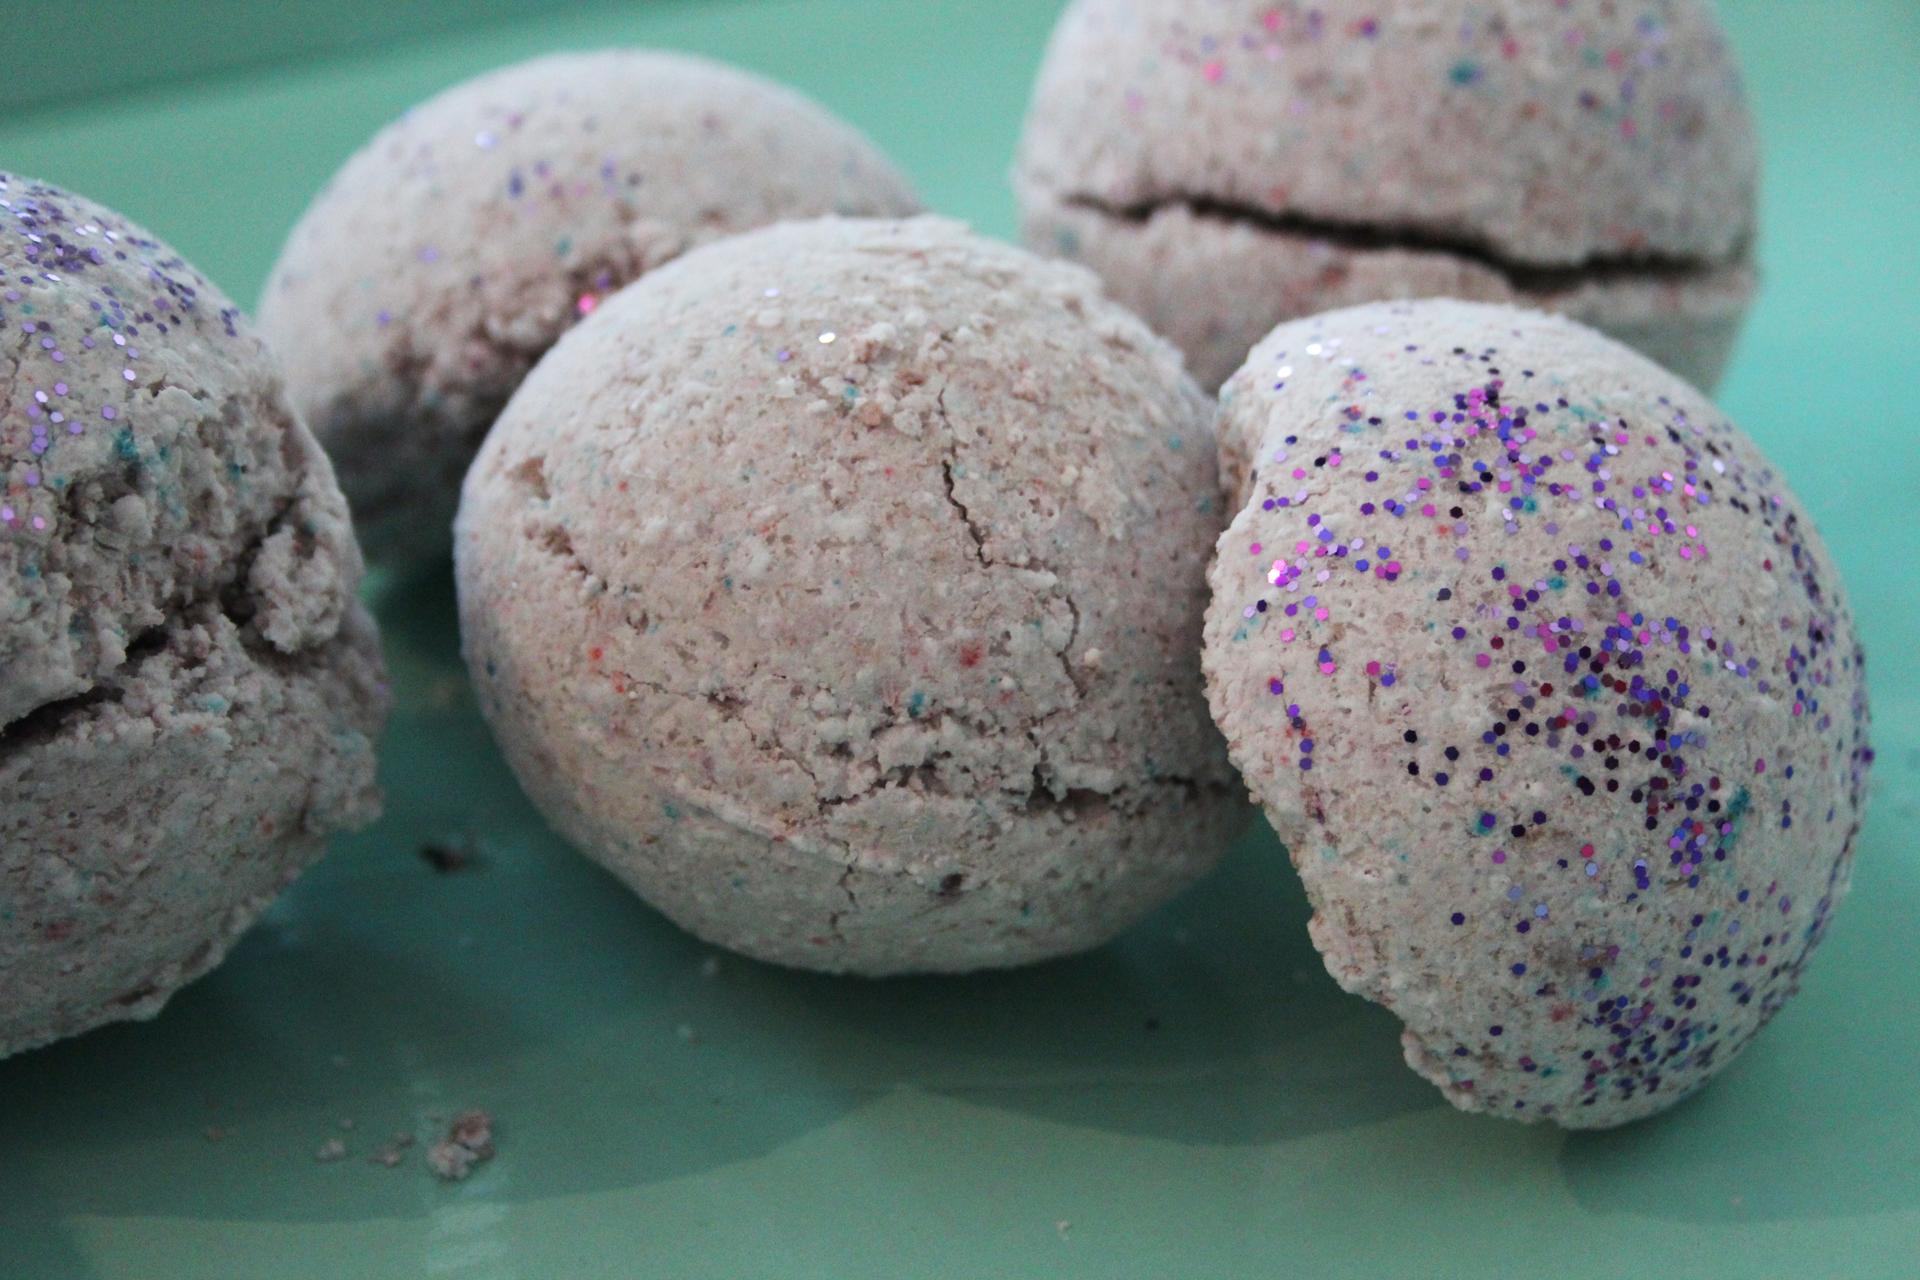 [/tatsu_text][tatsu_text max_width= "" wrap_alignment= "center" animation_type= "none"]This post is just an example of how even the best intentions can go sideways. I am by no means an "experienced" blogger, so I'm definitely still learning and trying to figure things out as I go along. Thanks for reading and following this journey with me![/tatsu_text][/tatsu_column][/tatsu_row][/tatsu_section]
 [/tatsu_text][tatsu_text max_width= "" wrap_alignment= "center" animation_type= "none"]
 [/tatsu_text][/tatsu_column][/tatsu_row][/tatsu_section]
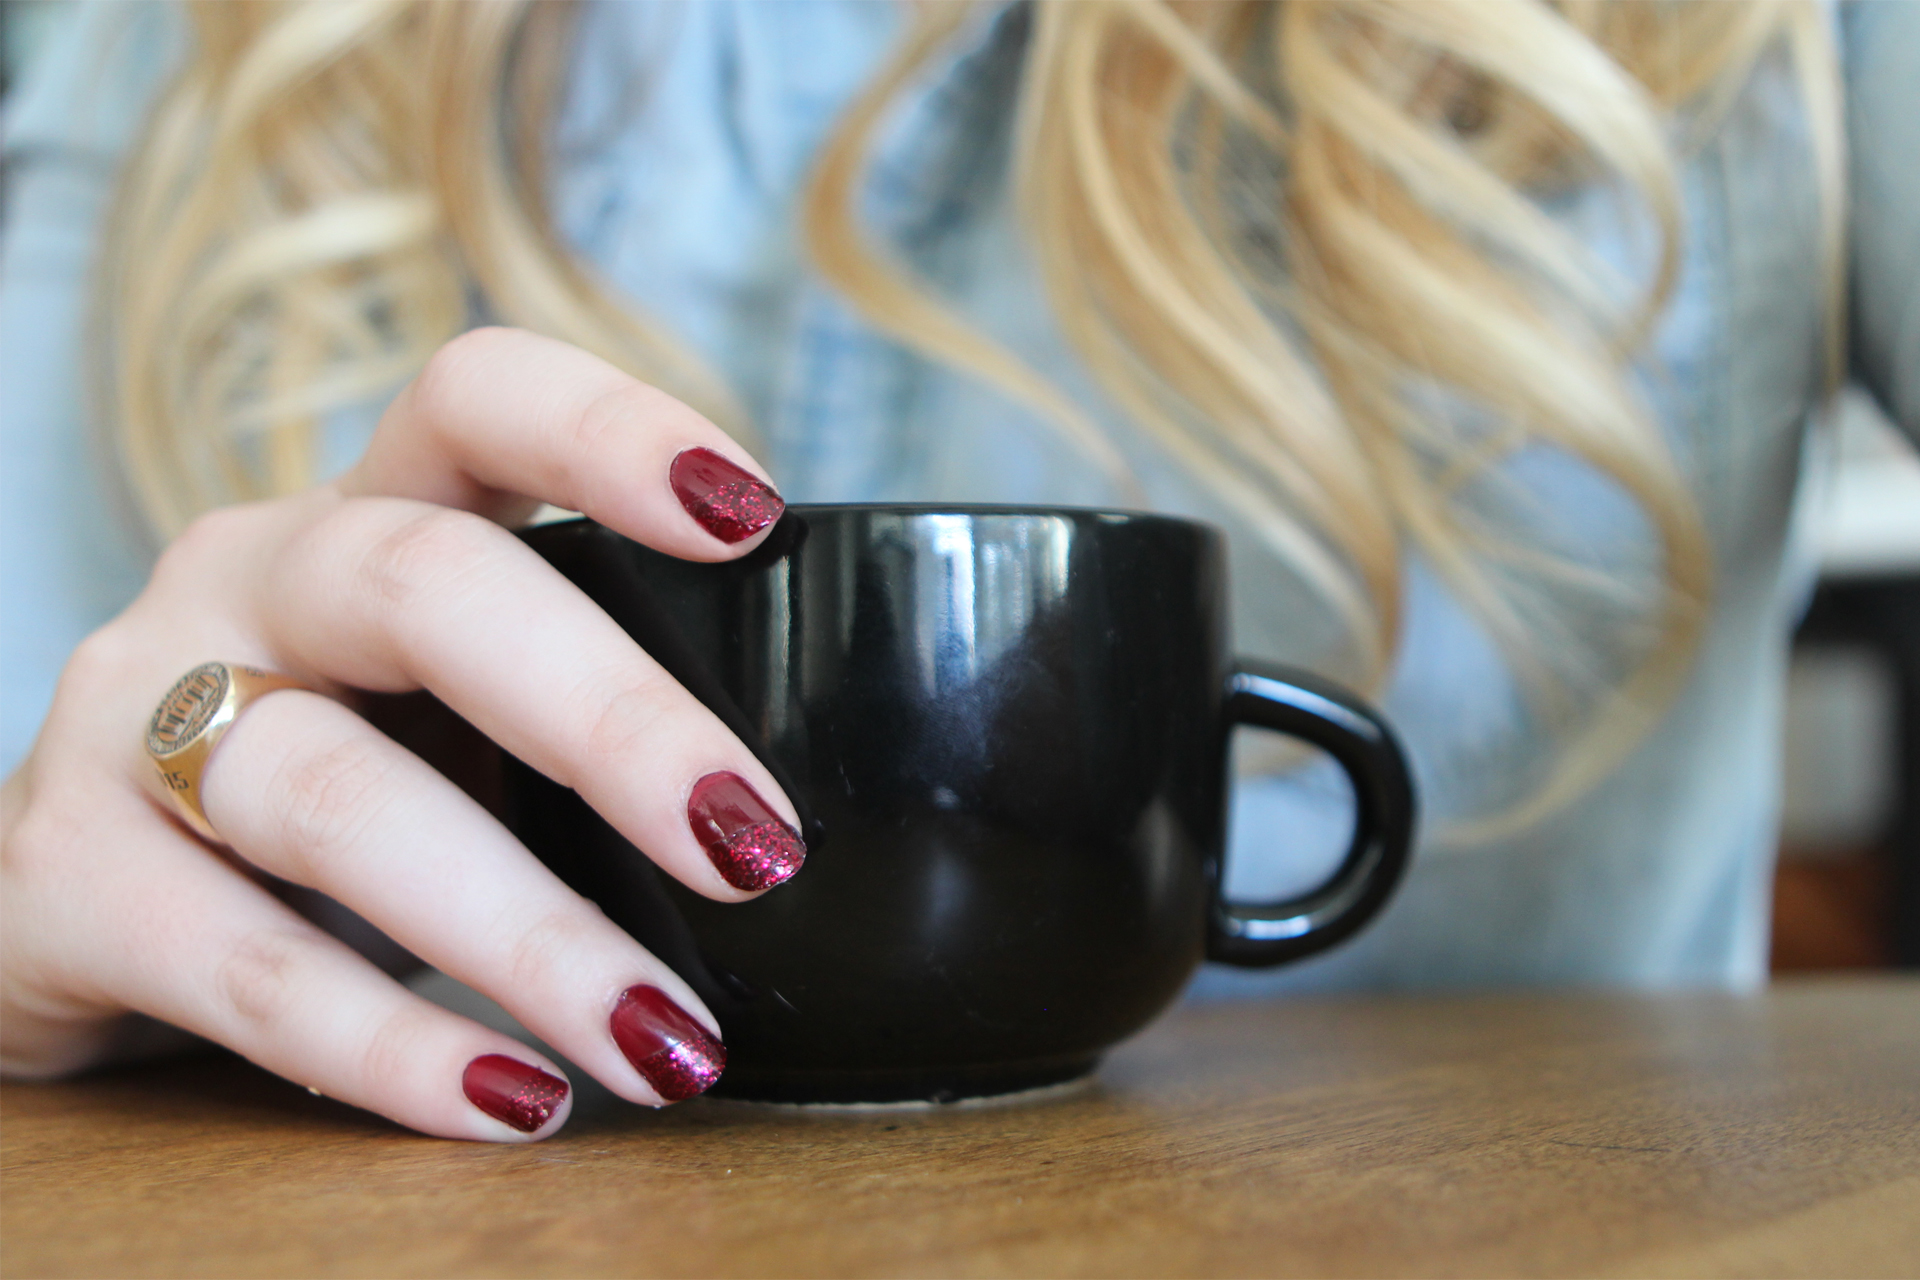 [/tatsu_text][tatsu_text max_width= "" wrap_alignment= "center" animation_type= "none"]To get this nail look, I used Sally Hansen's Cinna-Snap as a base over my entire nails and let them dry completely. Then I used scotch tape to block half my nail on the diagonal and painted Essie's Leading Lady on the top half. These two colors look gorgeous together and have really gotten me in the fall spirit–not that I needed any help with that![/tatsu_text][tatsu_text max_width= "" wrap_alignment= "center" animation_type= "none"]
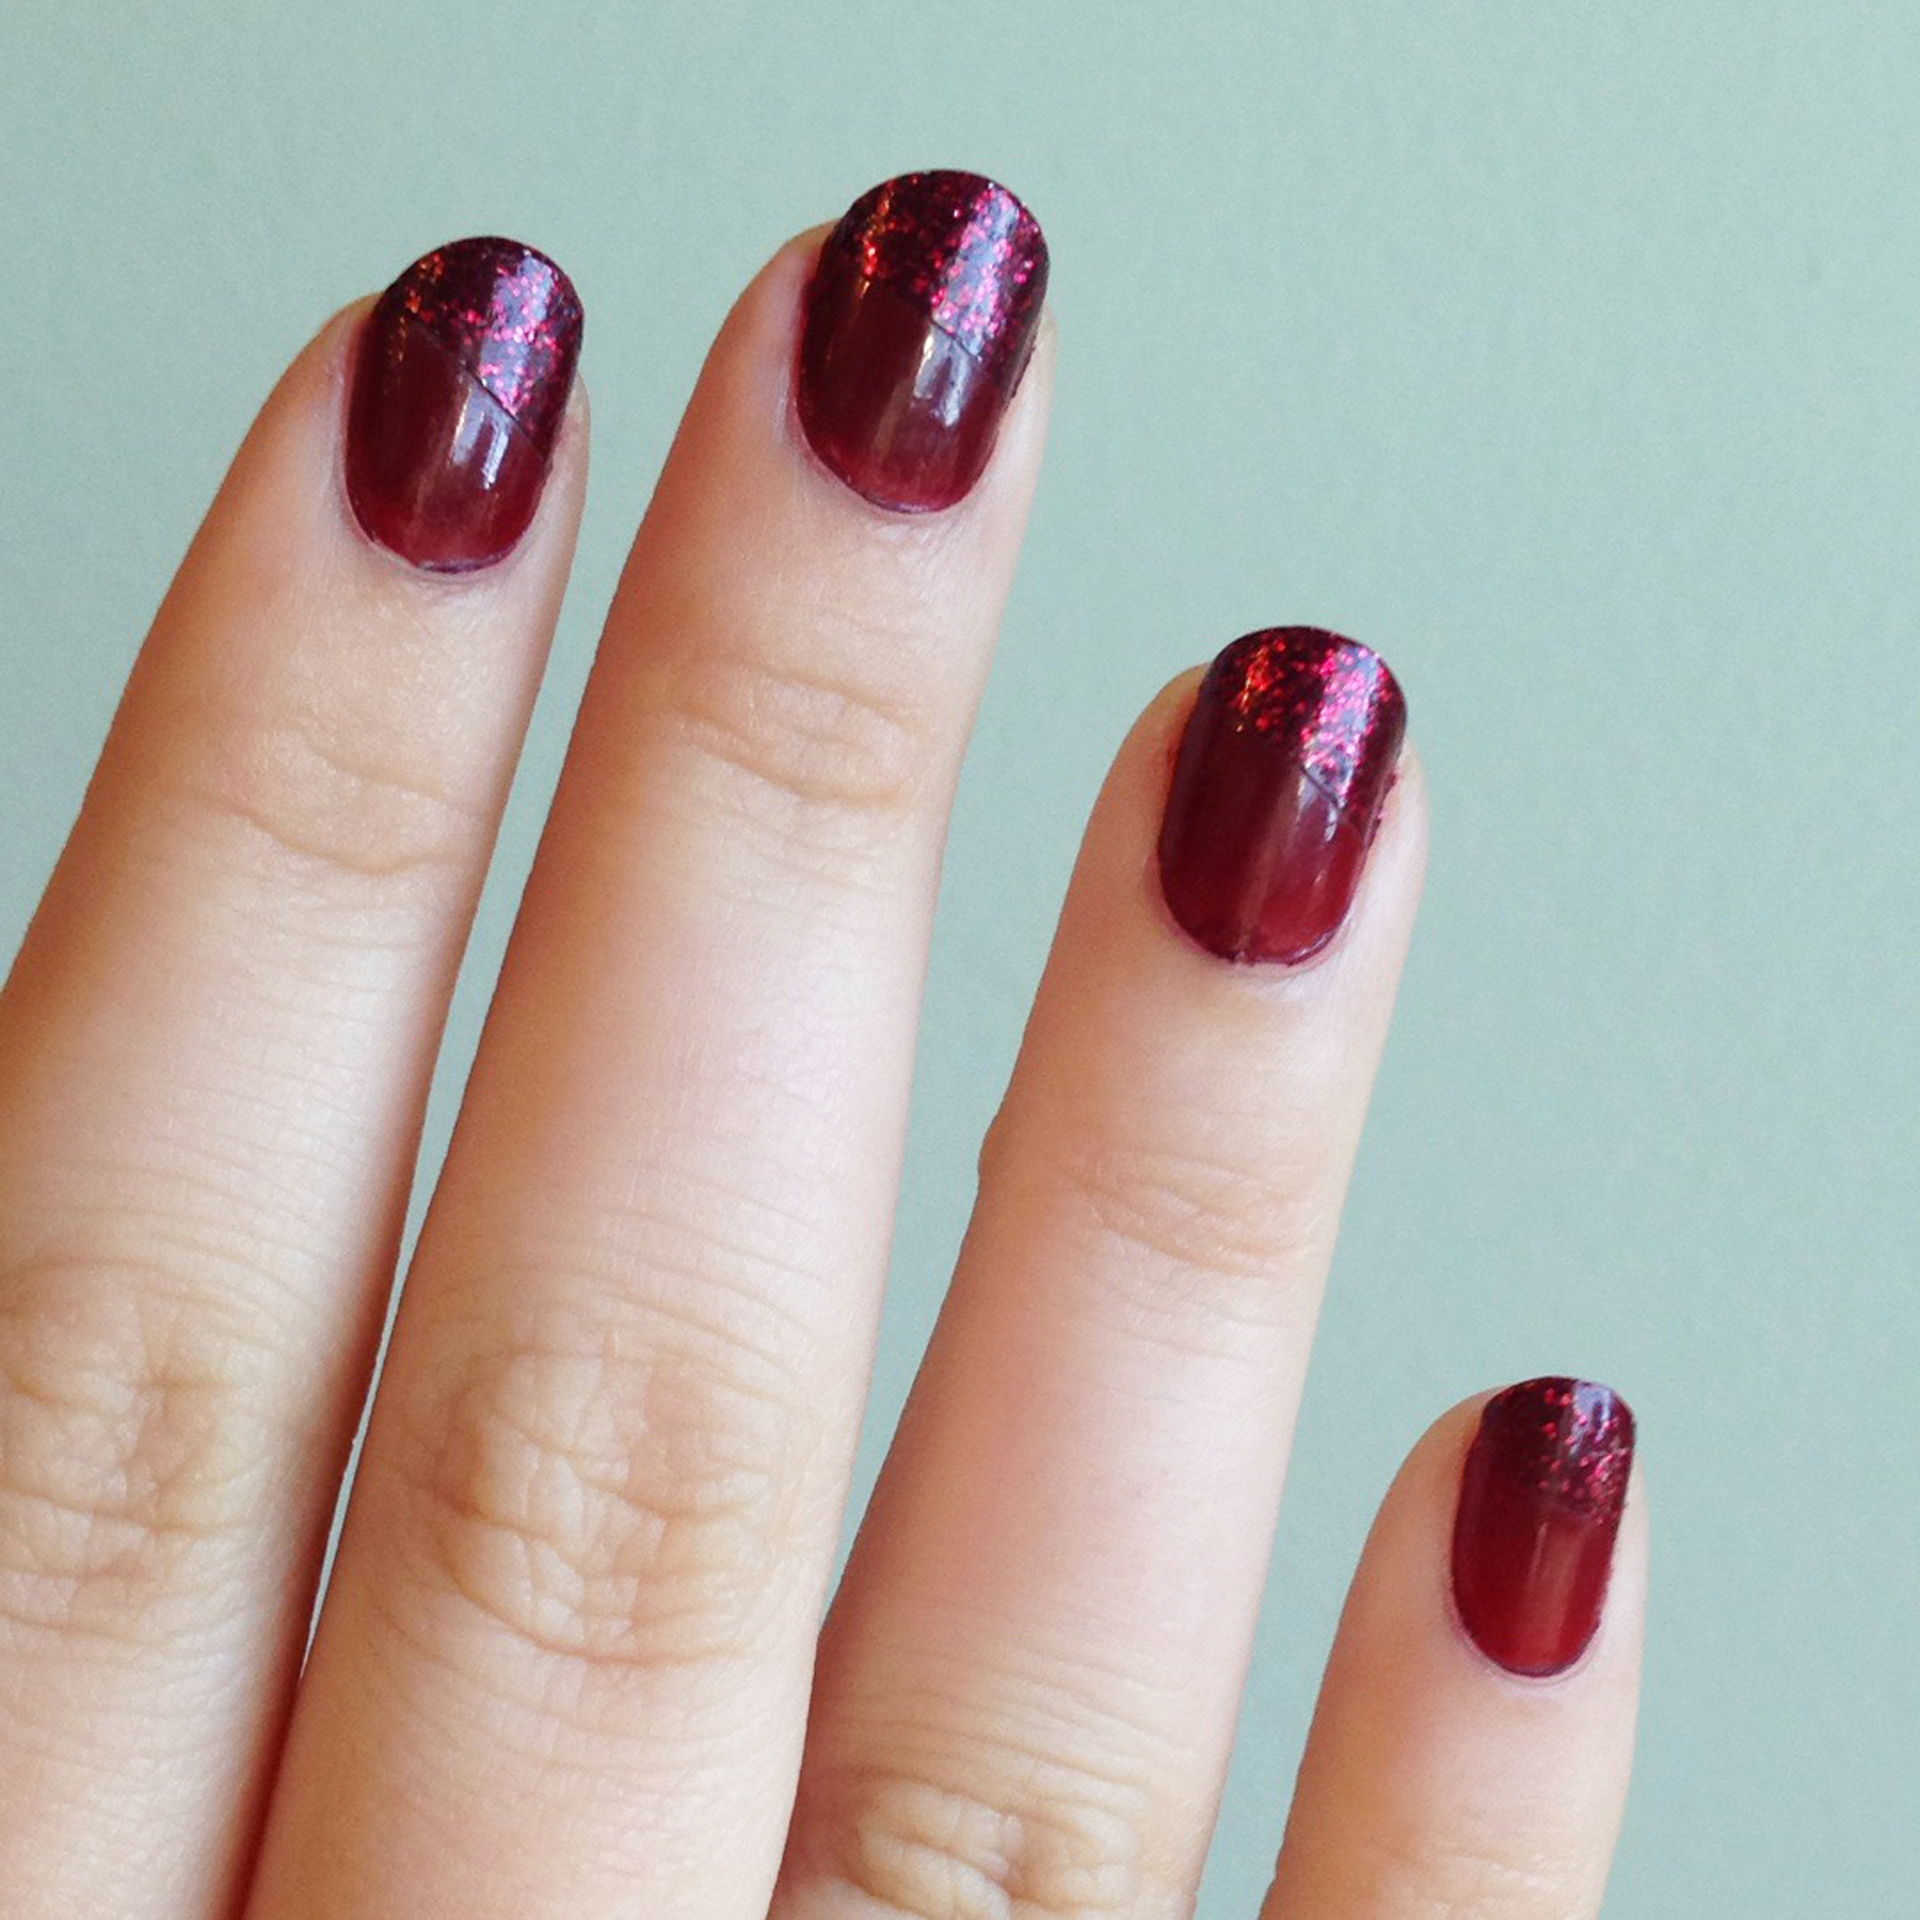 [/tatsu_text][tatsu_text max_width= "" wrap_alignment= "center" animation_type= "none"]And now for the best part–my Caramel Apple Cider Cocktail! It's incredibly easy, super delicious, and works well both cold and warmed up![/tatsu_text][tatsu_text max_width= "" wrap_alignment= "center" animation_type= "none"]
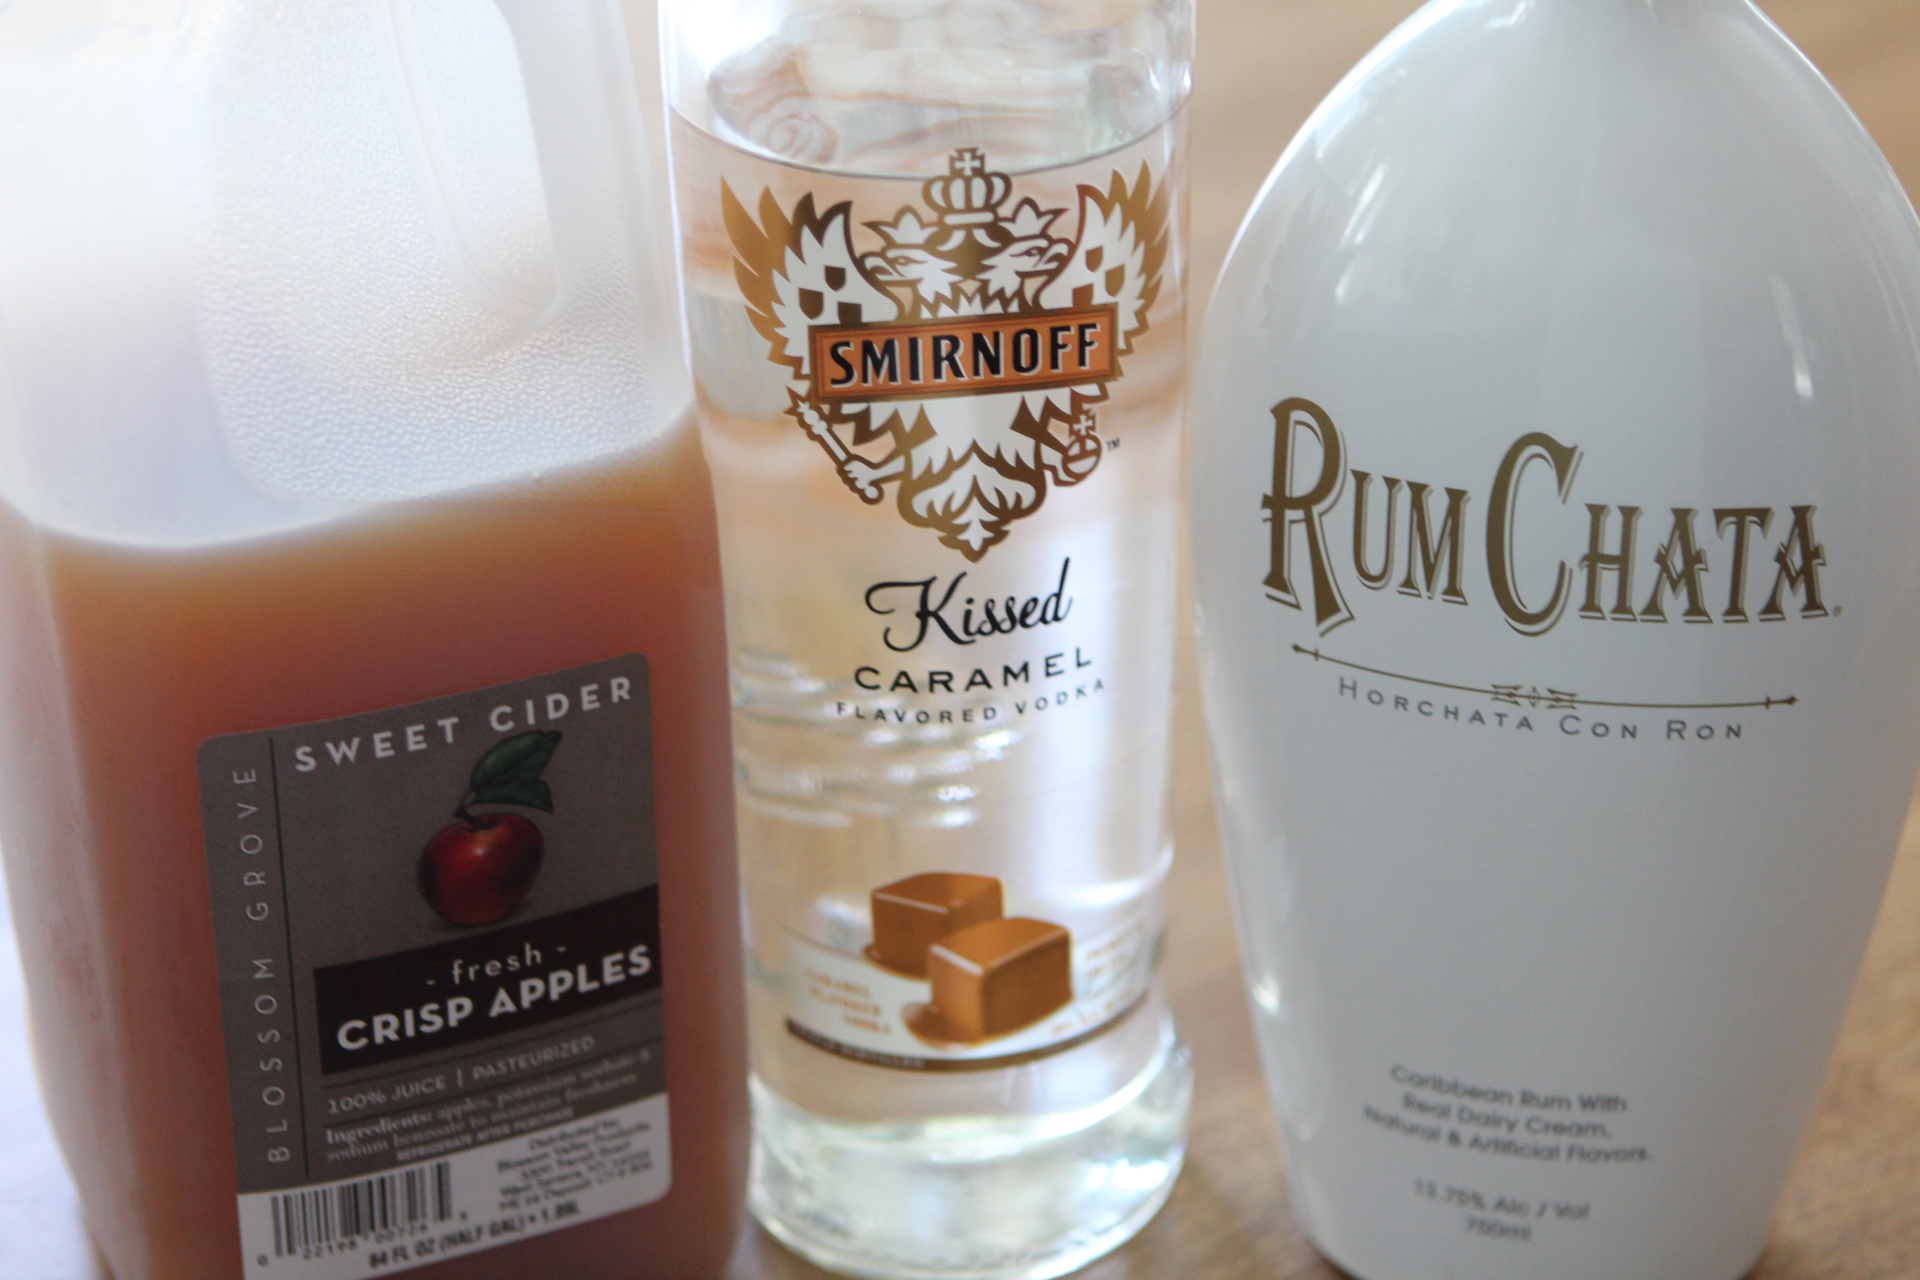 [/tatsu_text][tatsu_text max_width= "" wrap_alignment= "center" animation_type= "none"]
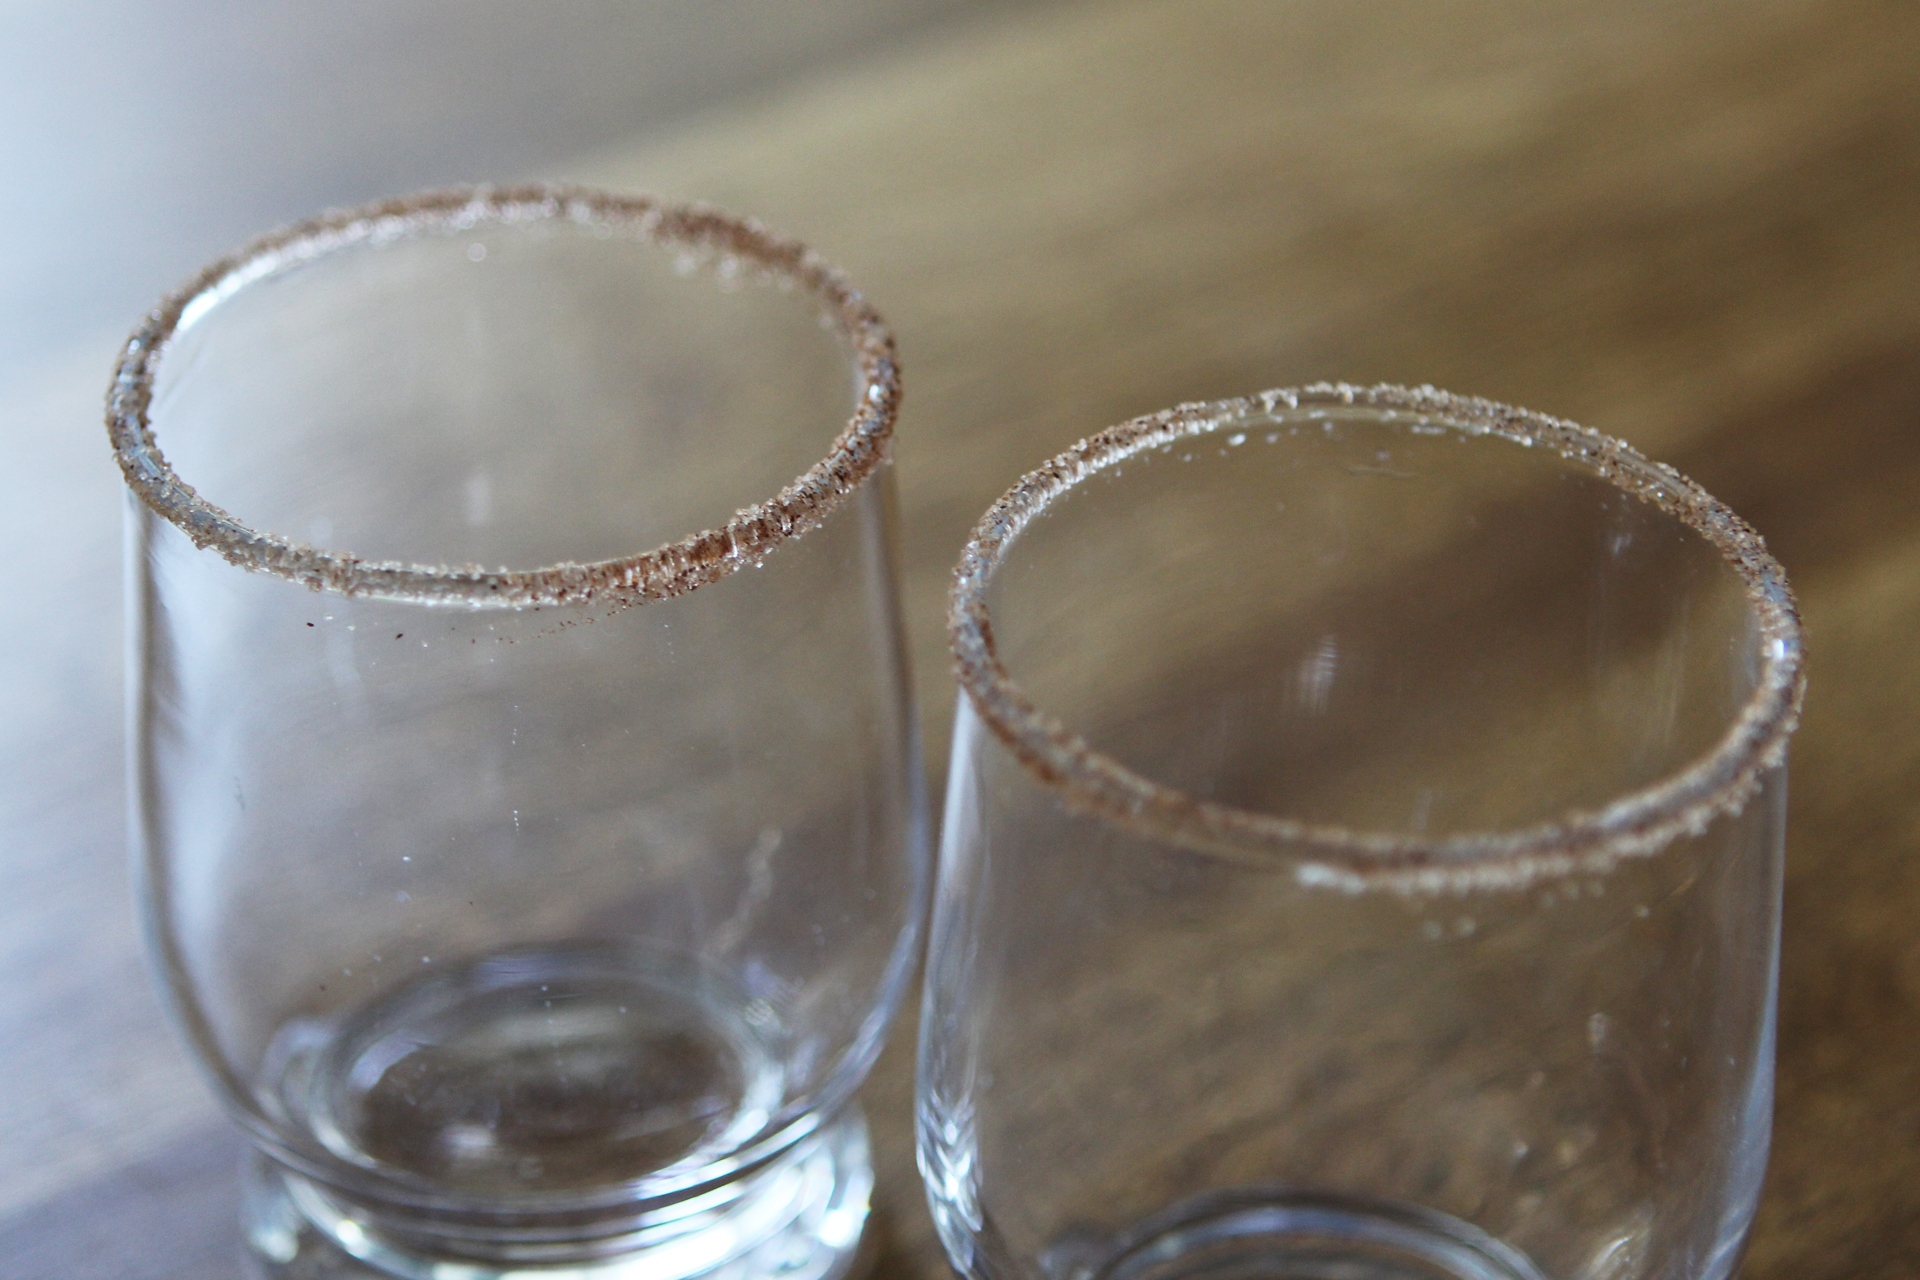 [/tatsu_text][tatsu_text max_width= "" wrap_alignment= "center" animation_type= "none"]Ingredients:
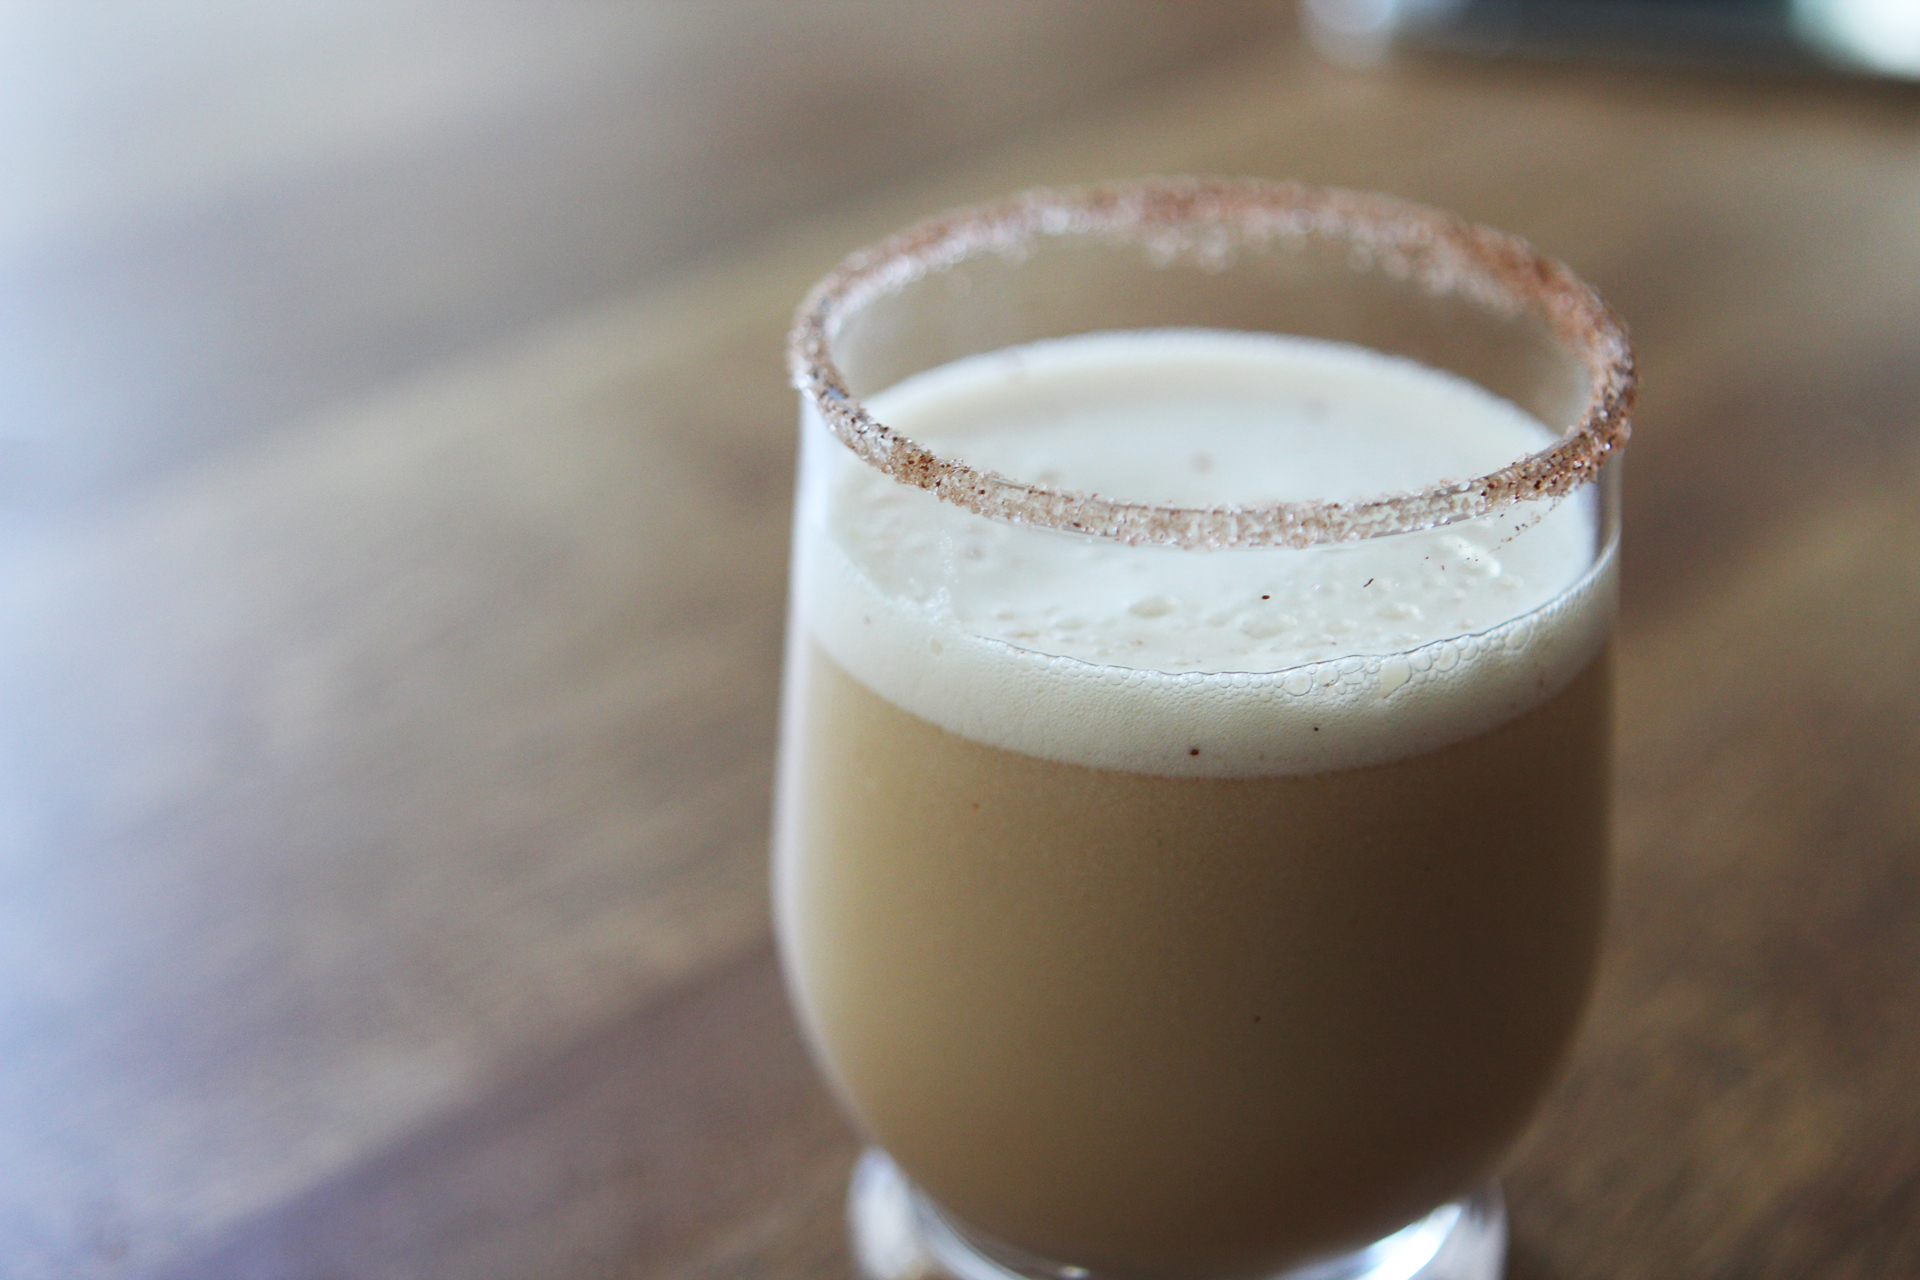 [/tatsu_text][tatsu_text max_width= "" wrap_alignment= "center" animation_type= "none"]Let me know what your favorite ways to celebrate fall are in the comments, or on
 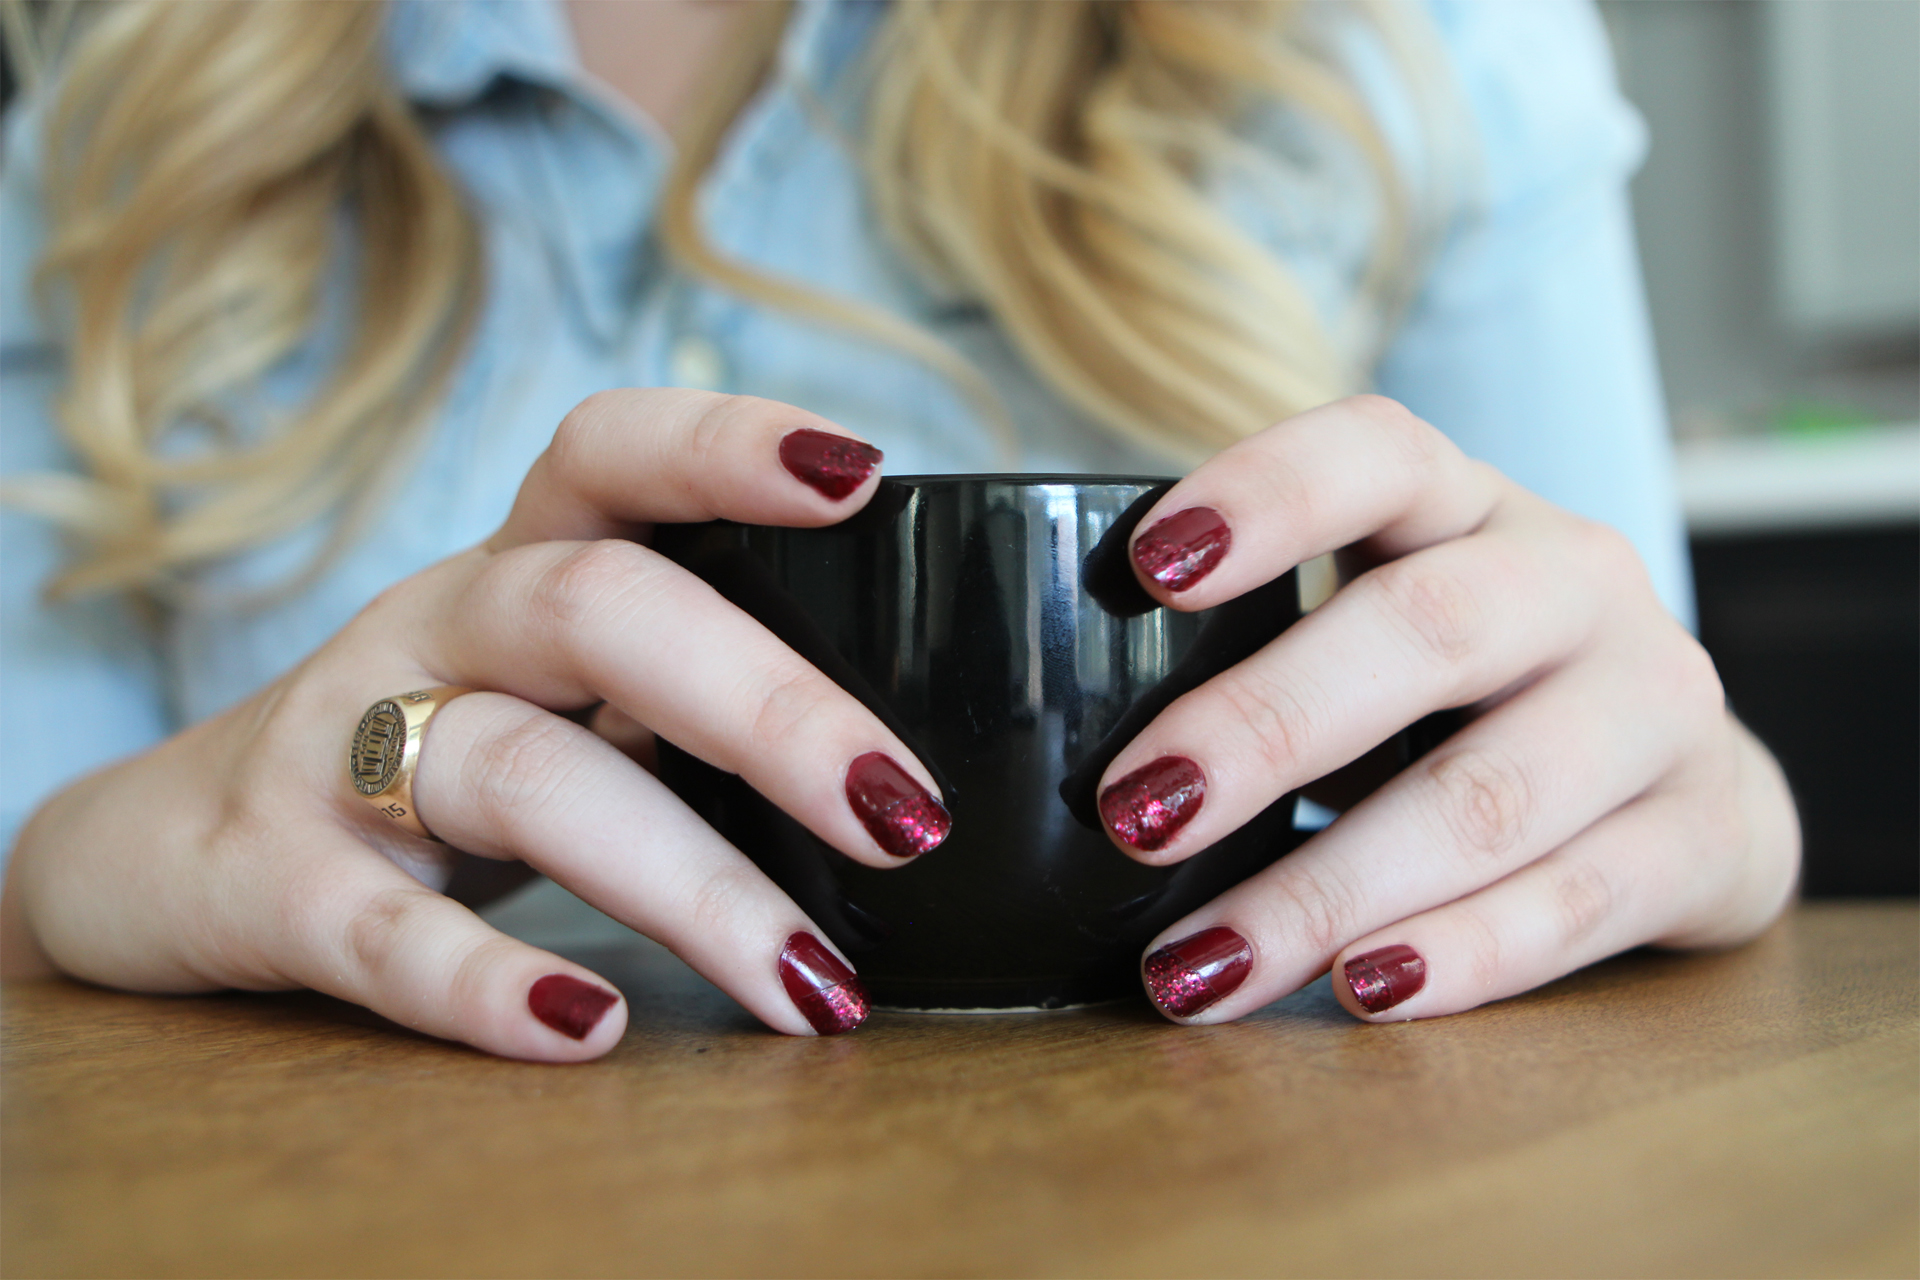 [/tatsu_text][tatsu_text max_width= "" wrap_alignment= "center" animation_type= "none"]
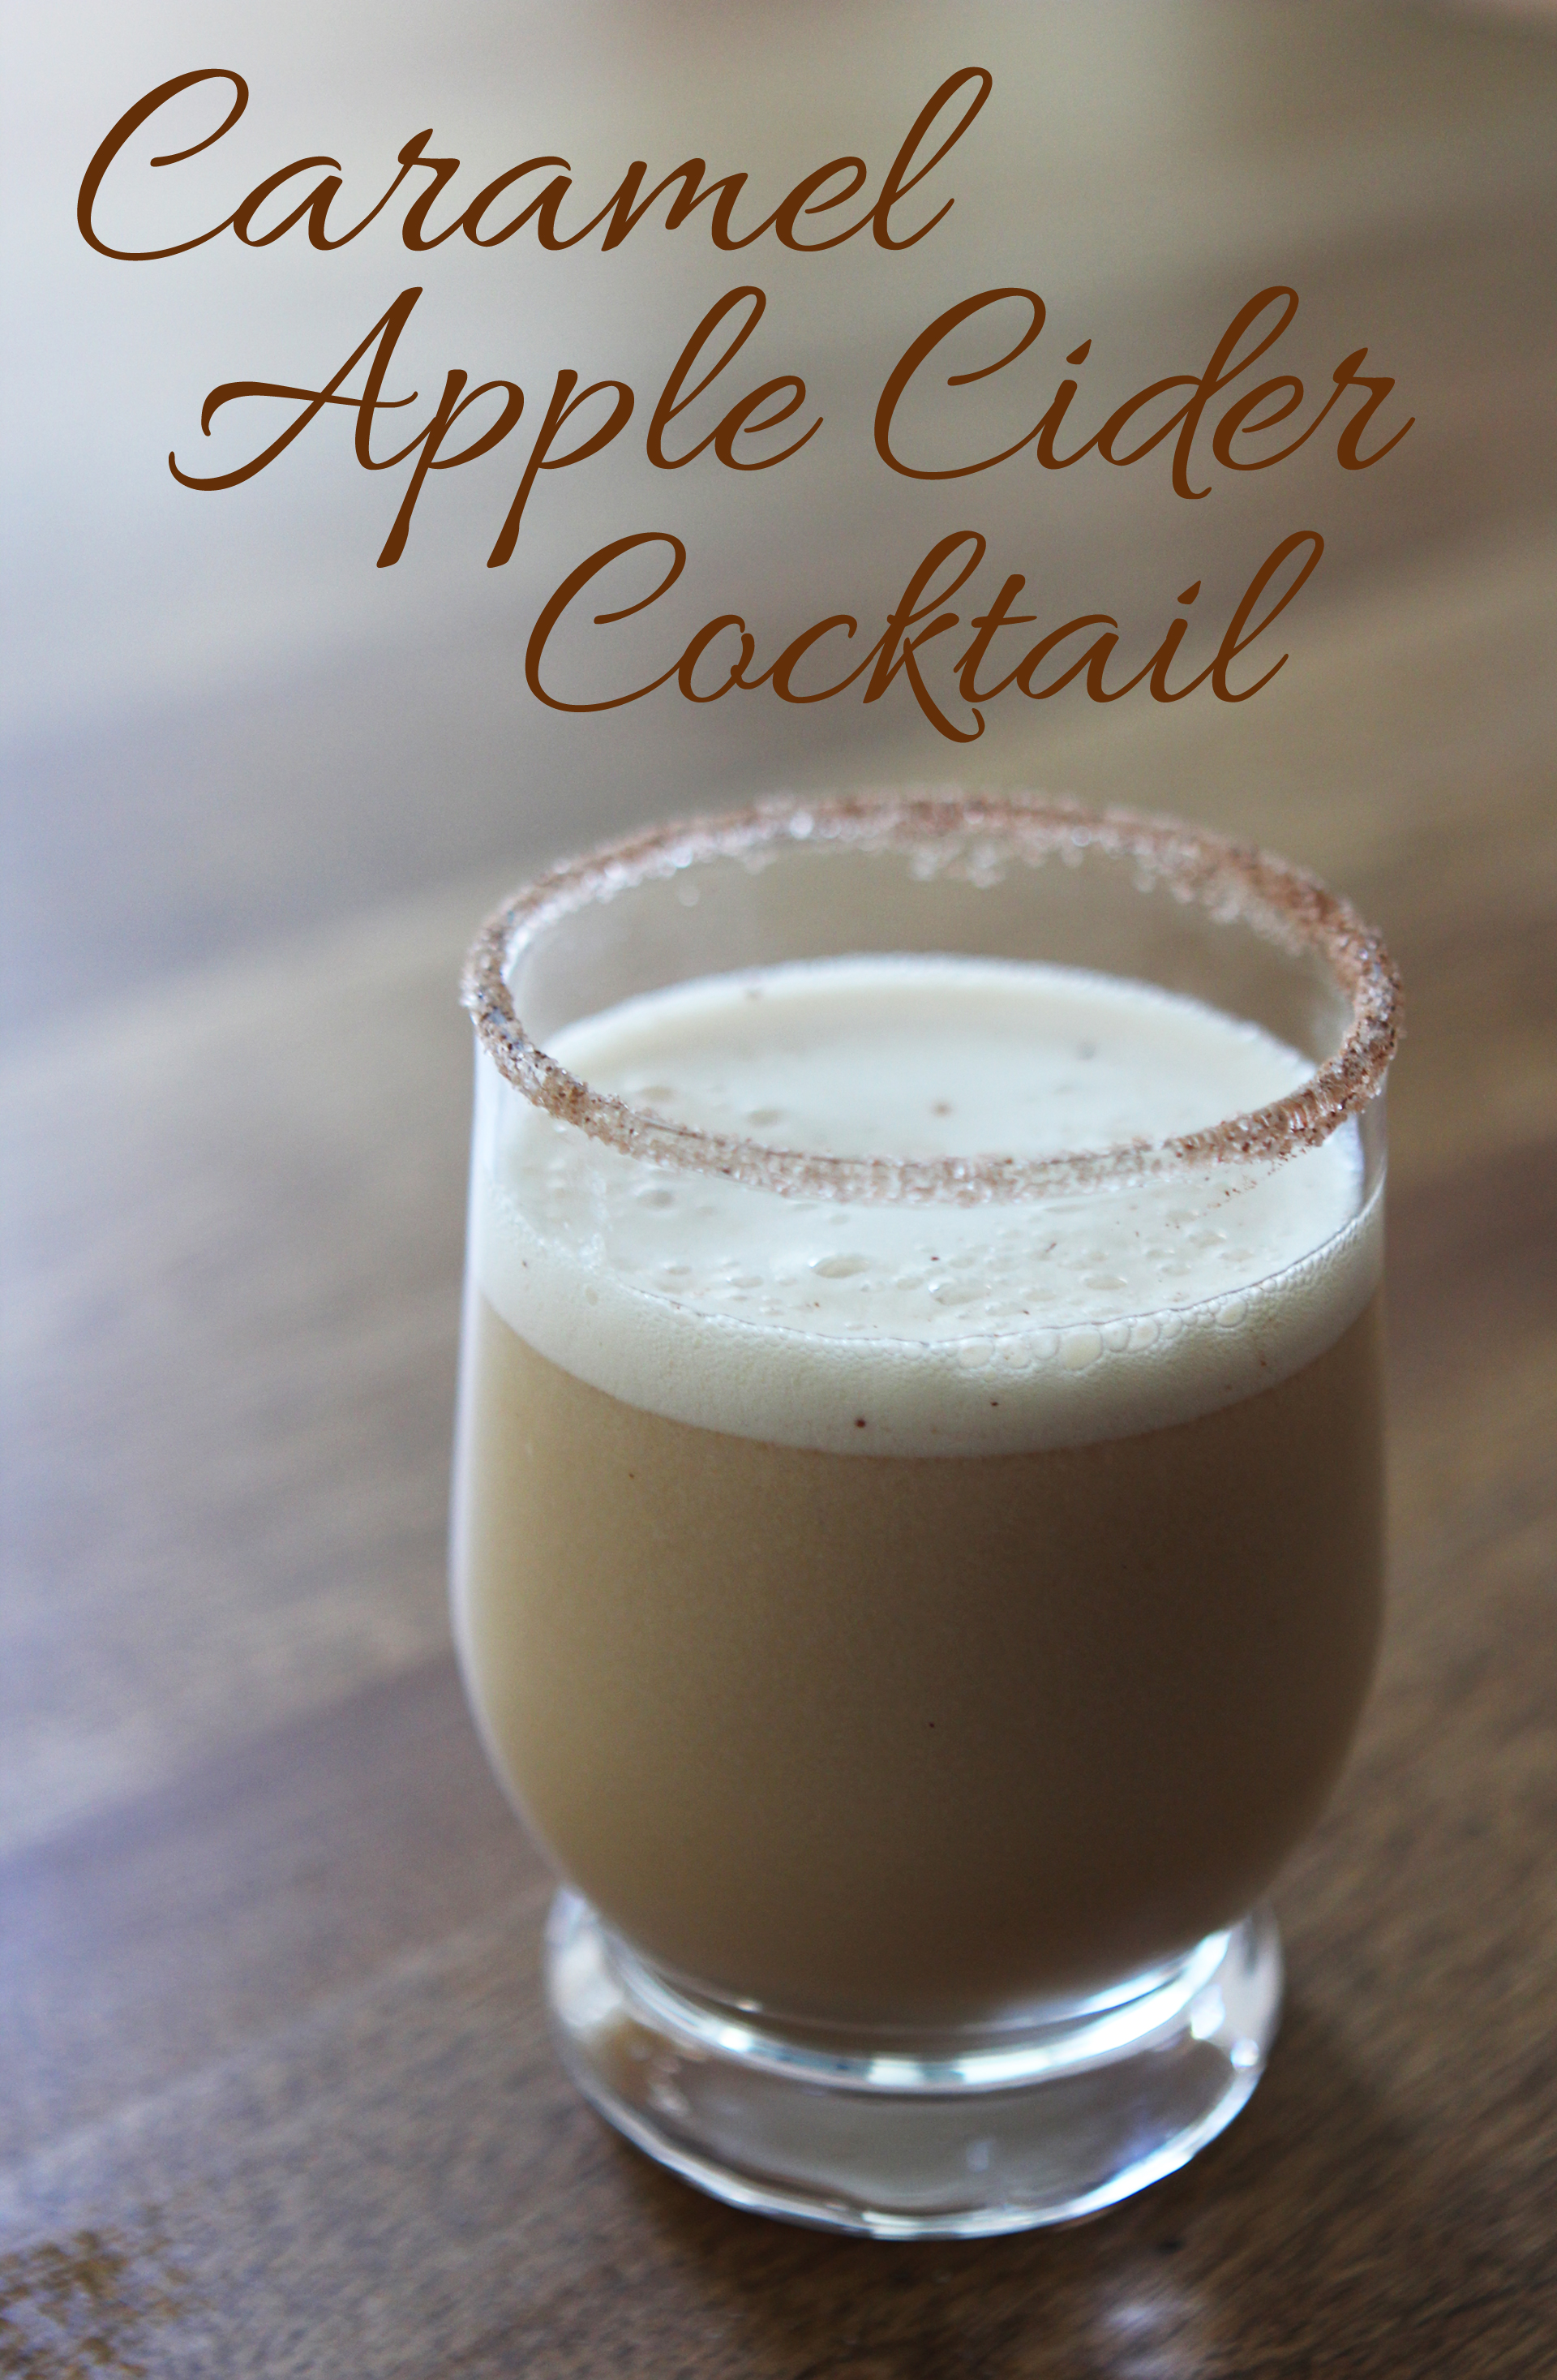 [/tatsu_text][/tatsu_column][/tatsu_row][/tatsu_section]
 [/tatsu_text][tatsu_text max_width= "" wrap_alignment= "center" animation_type= "none"]However, one point of contention lies with the idea brought forth by Olivier Debie that Sano plagiarized his work for Belgium’s Théâtre de Liège. The Tokyo 2020 Organizing Committee defended Sano’s work, explaining that prior to choosing the design, the group “conducted long, extensive, and international verifications through a transparent process.” While the two do share a striking resemblance, Debie’s mark is not registered or copyrighted, giving his claims to take legal action much less impact. With the rise of social media, everyone’s opinion is heard–whether they know anything about graphic design or not. This can be both helpful and harmful, as it’s become nearly impossible for any awaited design to meet a majority of positive reviews. However,
 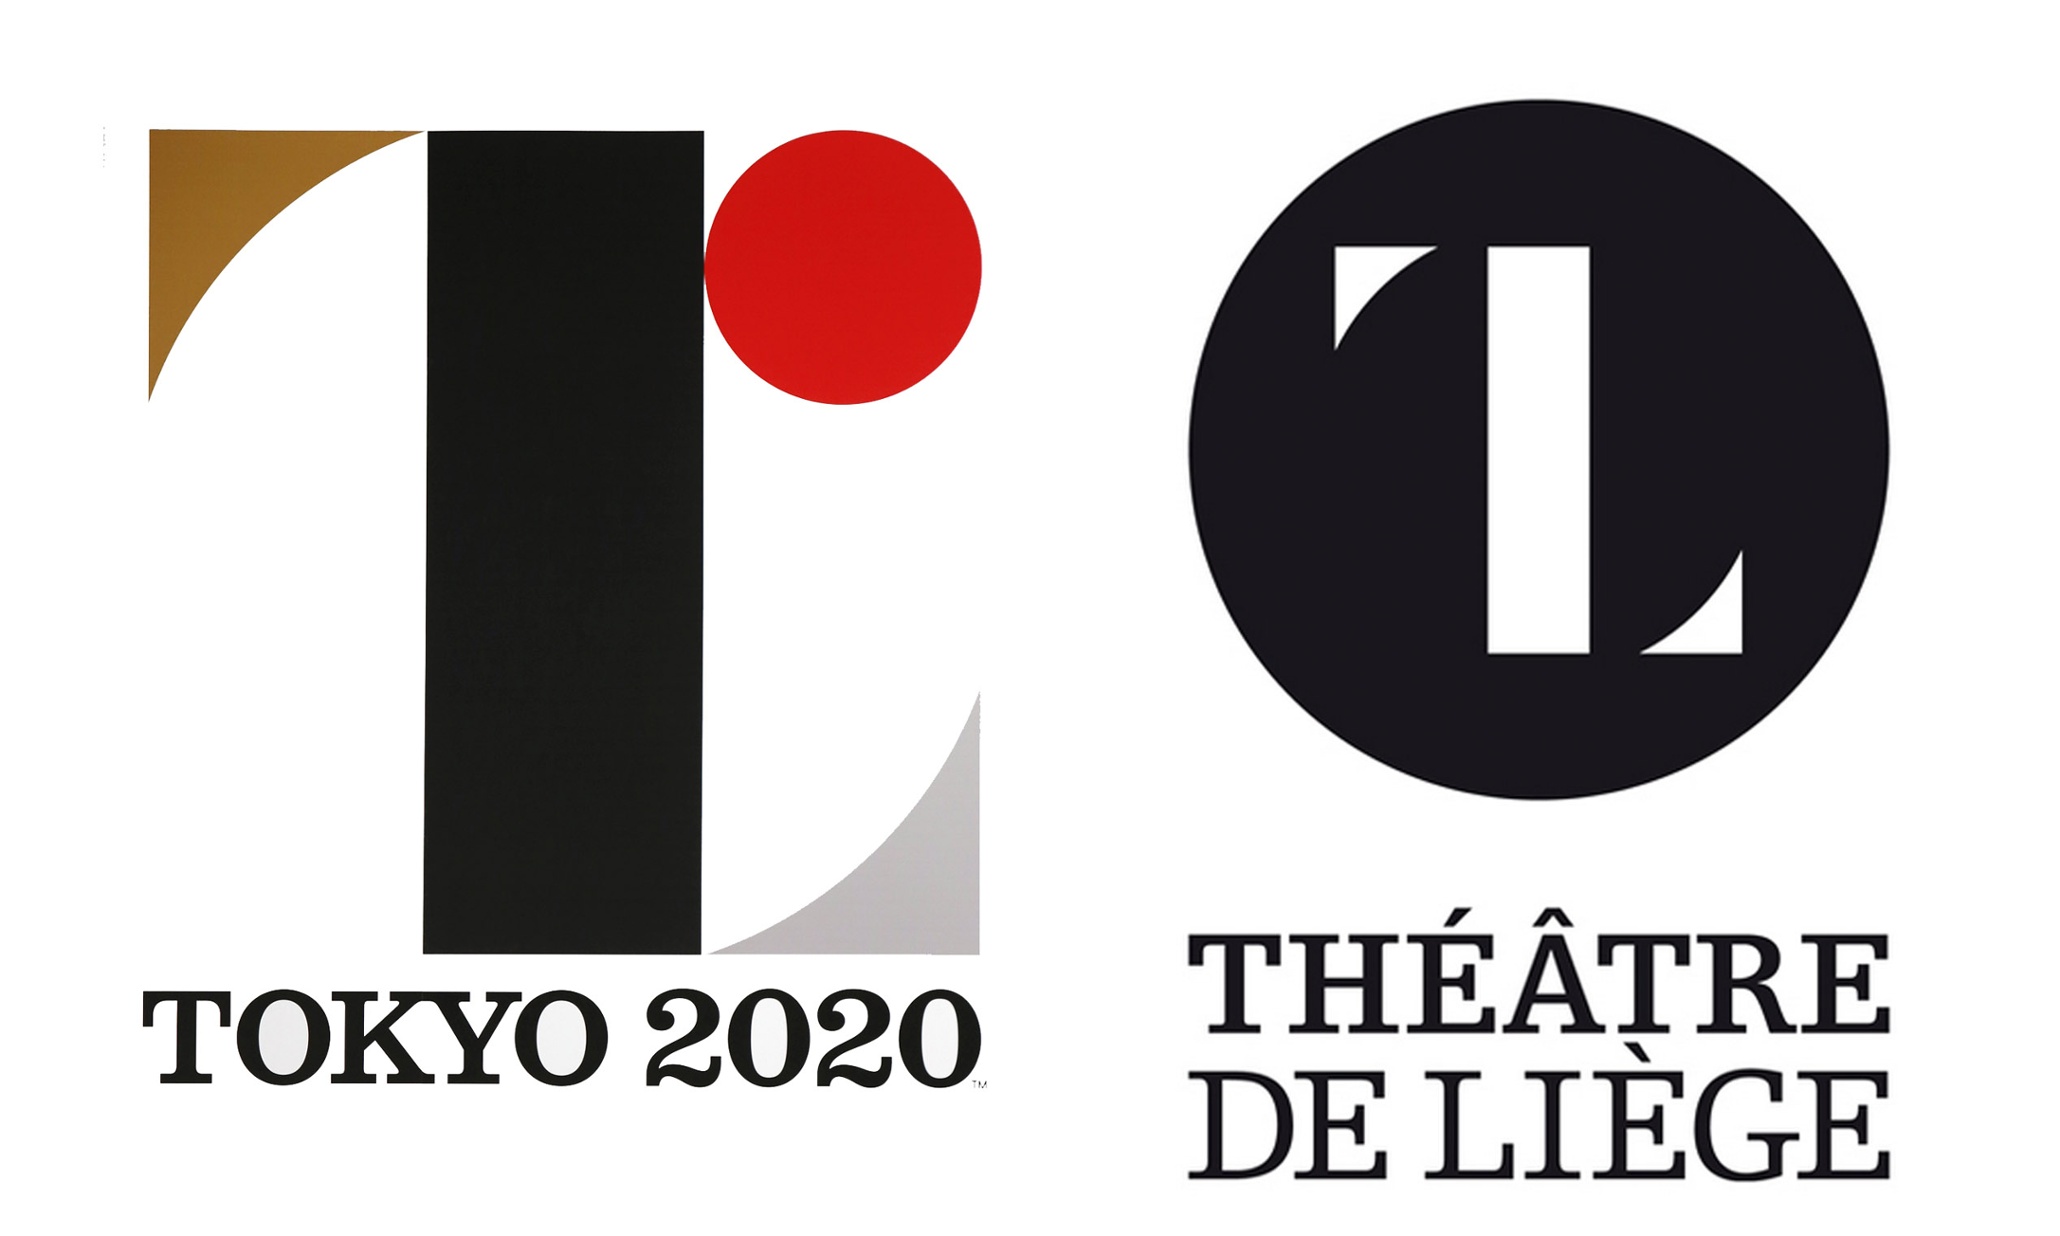 [/tatsu_text][tatsu_text max_width= "" wrap_alignment= "center" animation_type= "none"]I love the Olympics and I also love branding systems, so the task of forming the identity of the Olympic Games is one that has always interested me. My final semester in school, I completed an independent study project where I created an identity system that was adaptable to whichever city was chosen to host the Olympics in 2024. The system for
 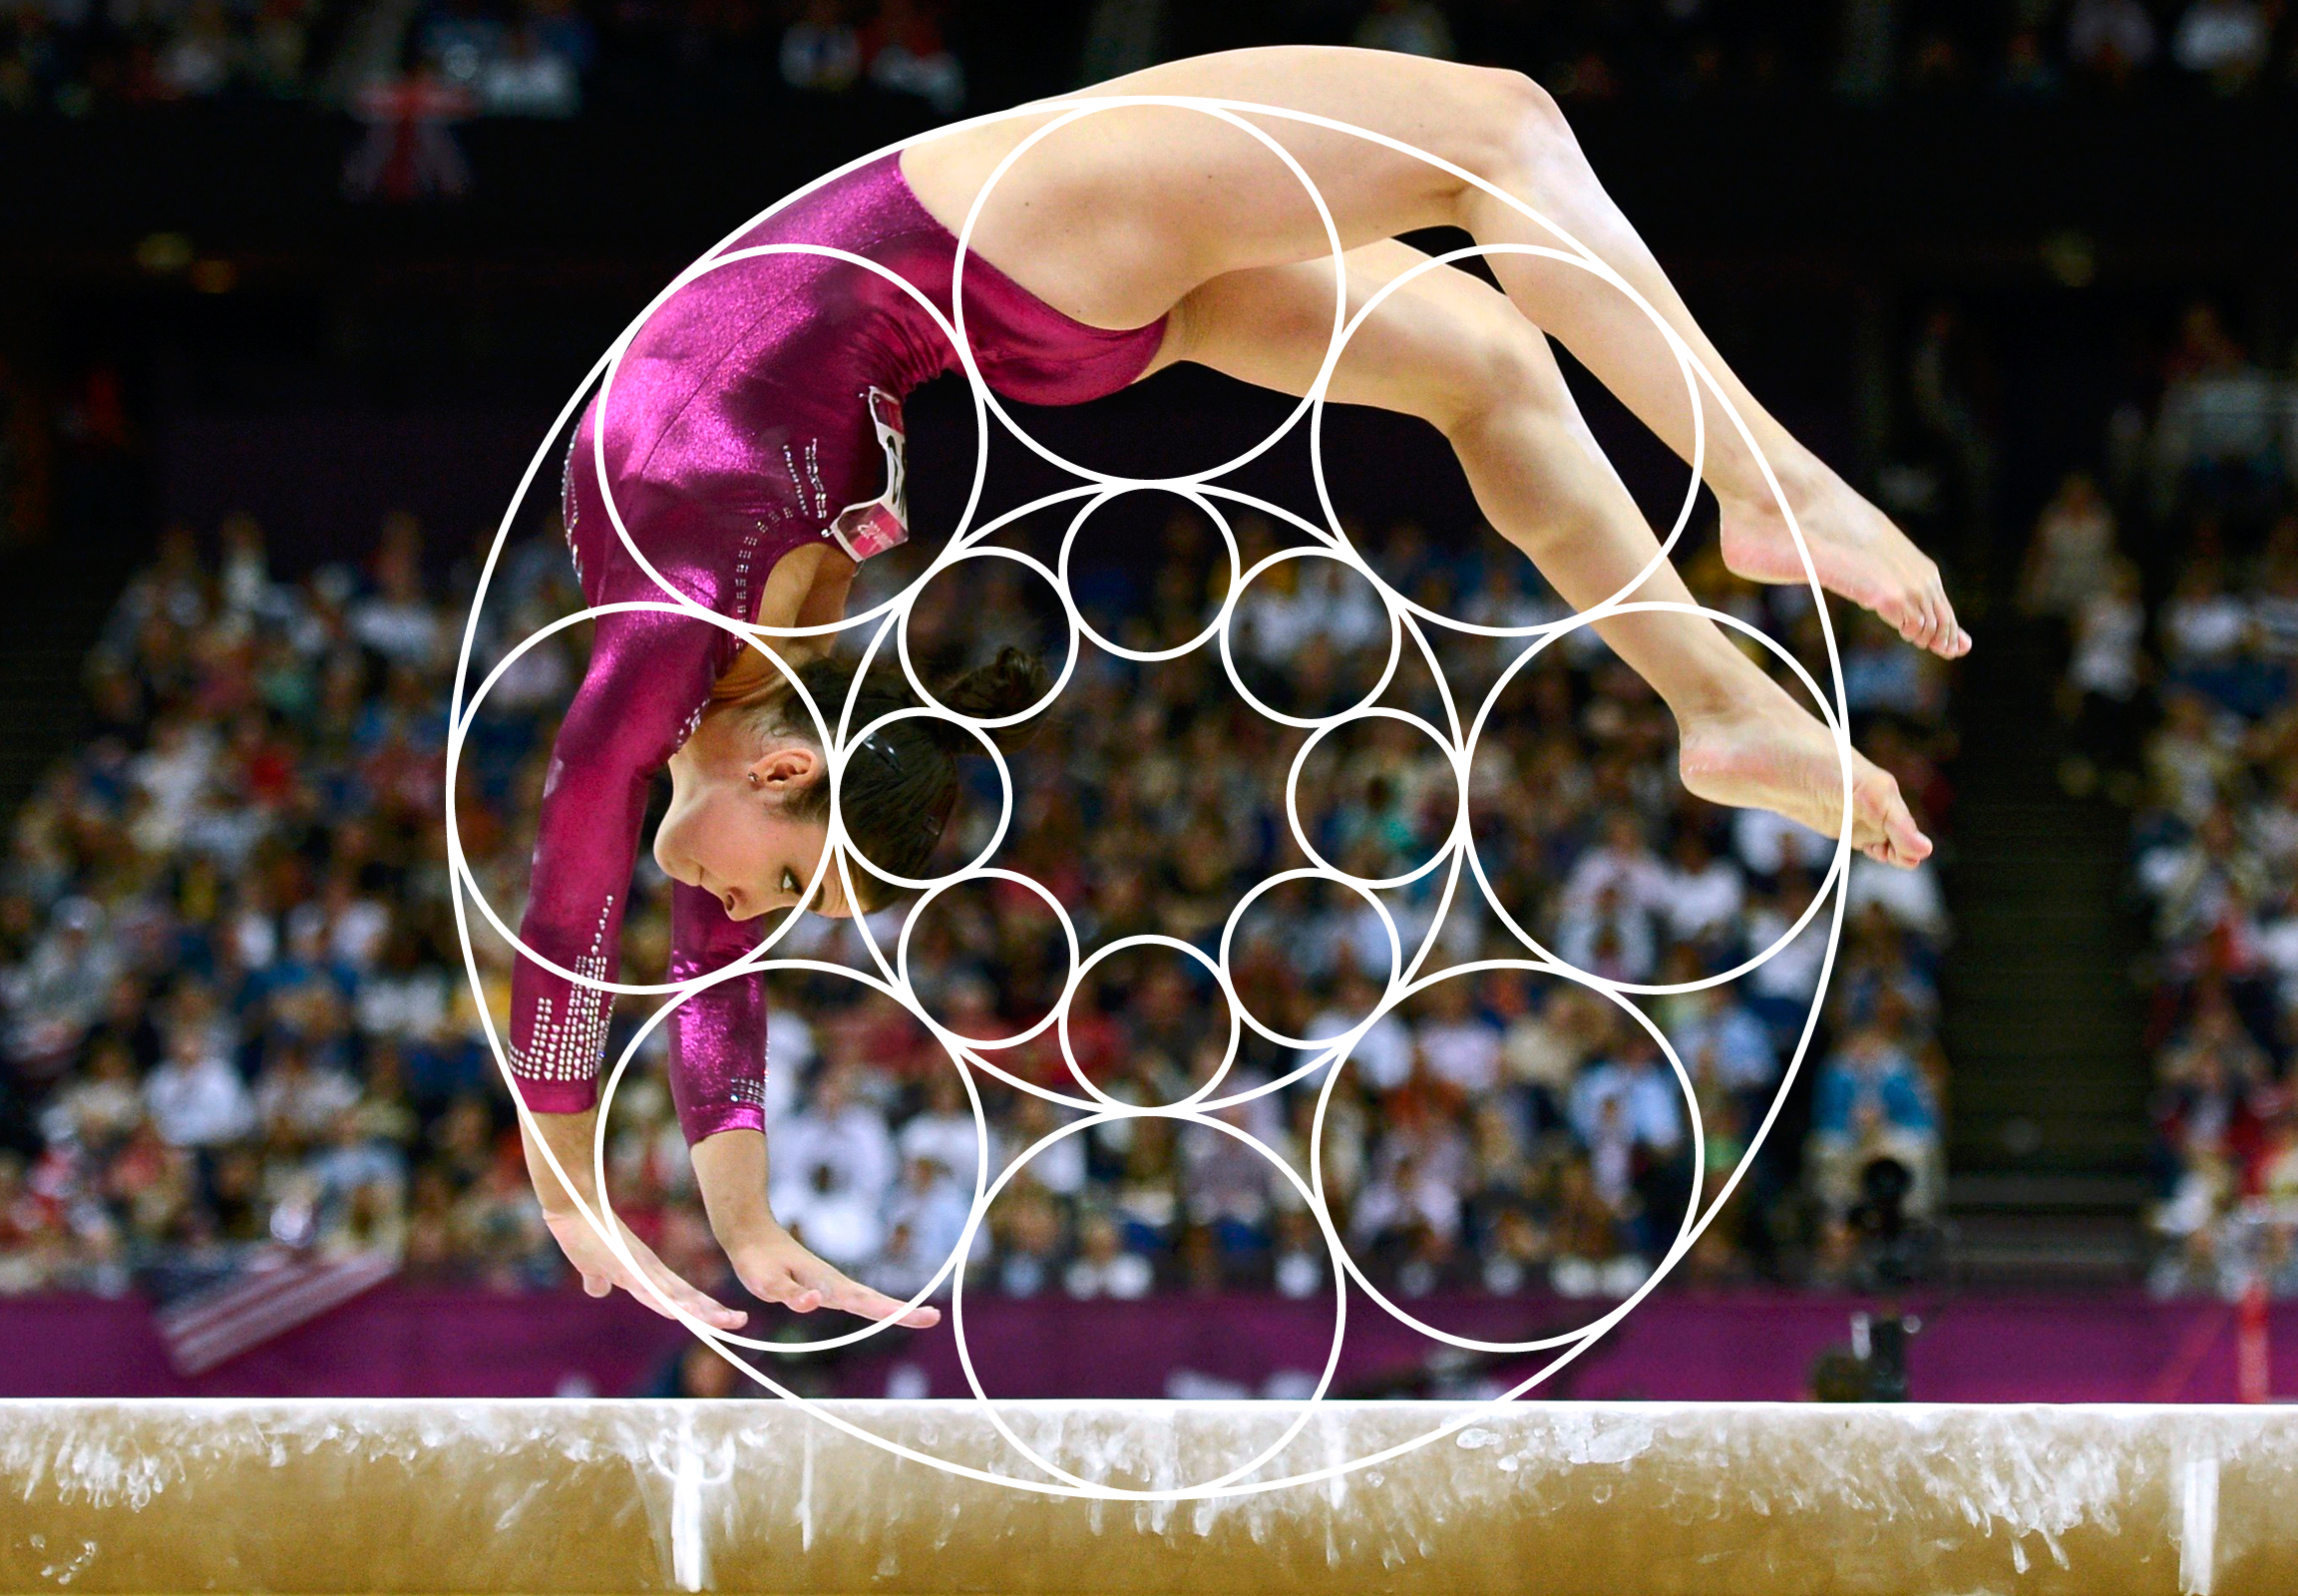 [/tatsu_text][tatsu_text max_width= "" wrap_alignment= "center" animation_type= "none"]
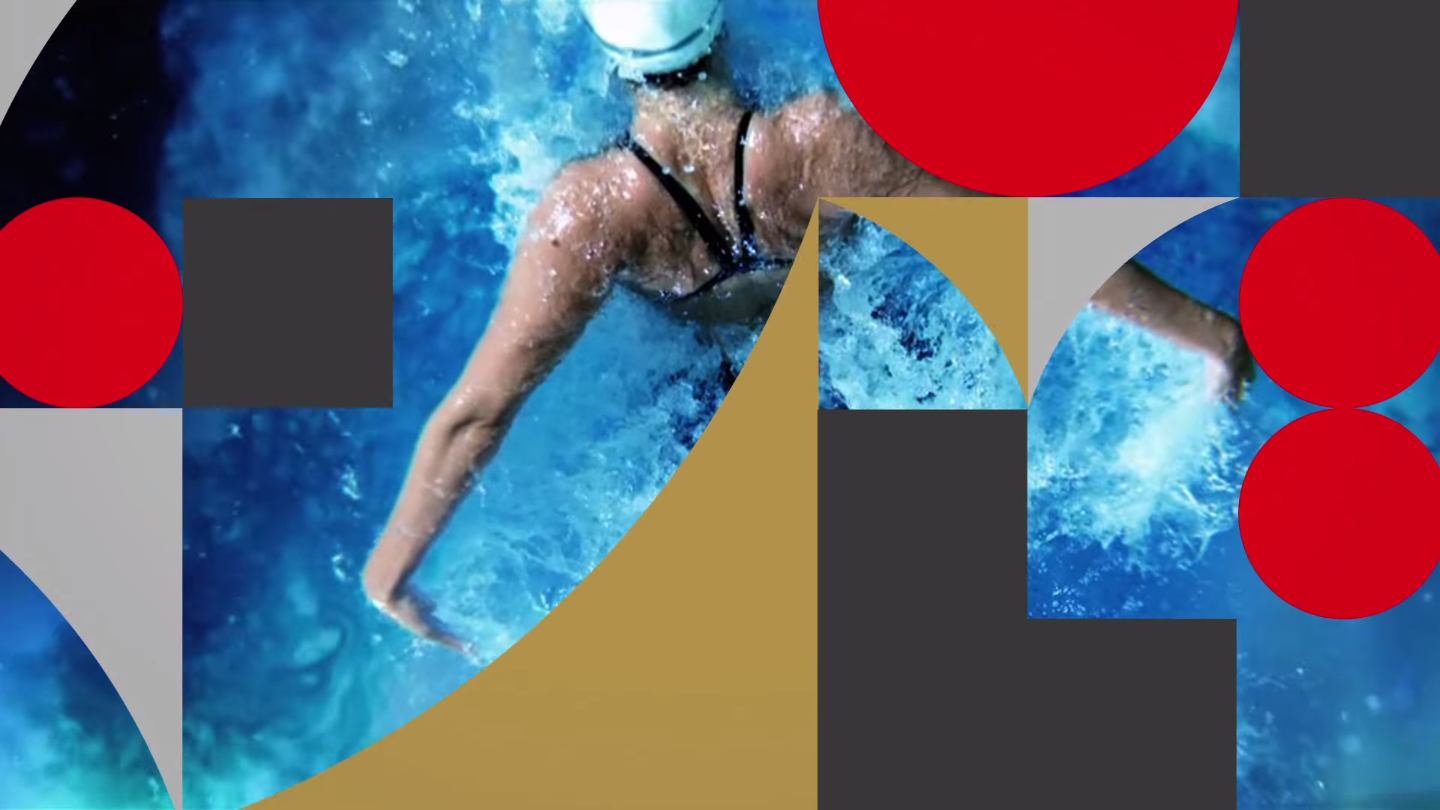 [/tatsu_text][tatsu_text max_width= "" wrap_alignment= "center" animation_type= "none"]
 [/tatsu_text][tatsu_text max_width= "" wrap_alignment= "center" animation_type= "none"]
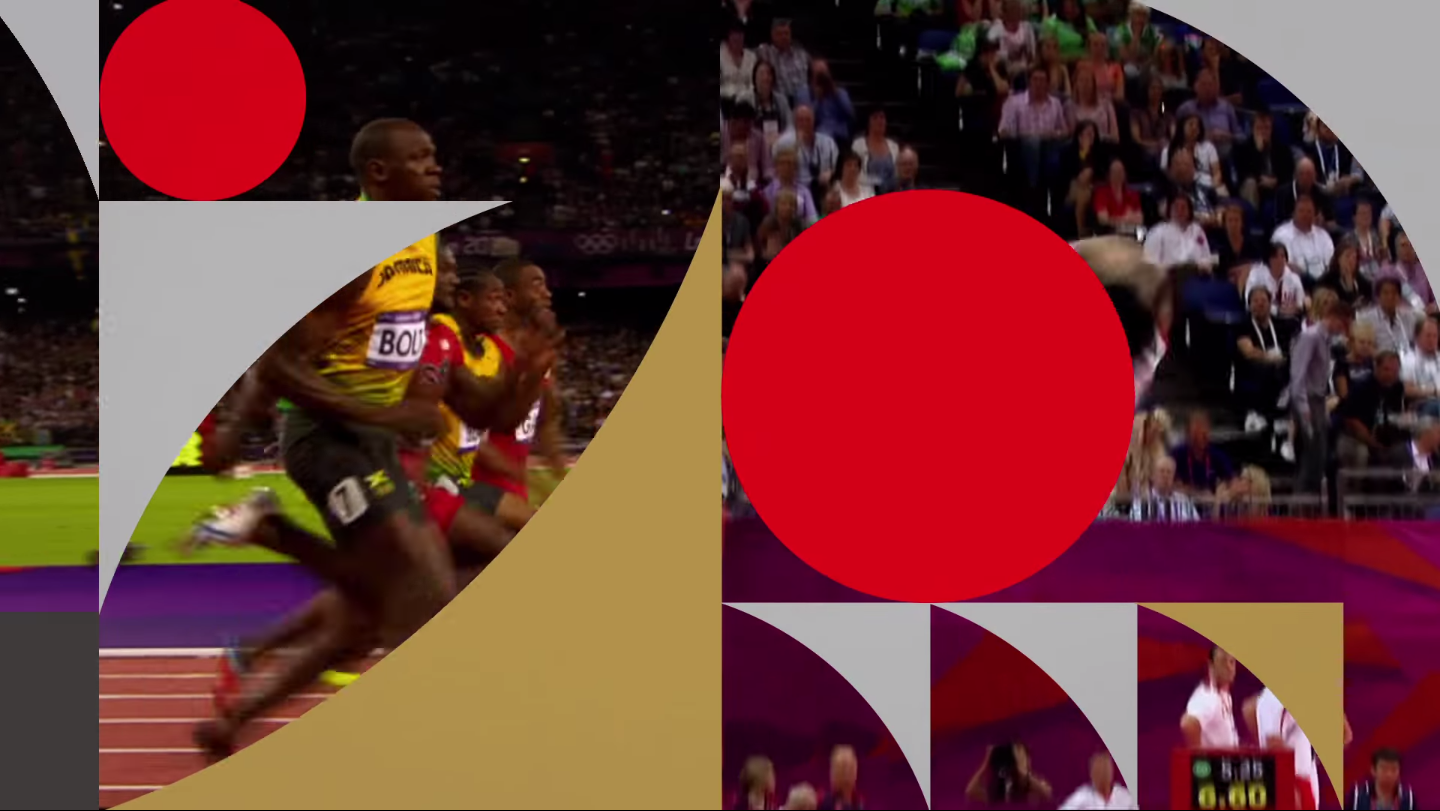 [/tatsu_text][tatsu_text max_width= "" wrap_alignment= "center" animation_type= "none"]I’m eager to see how the system is implemented across various mediums as we get closer to the Games and more materials are released.[/tatsu_text][/tatsu_column][/tatsu_row][/tatsu_section]